DIY Garage Floor Epoxy Coating
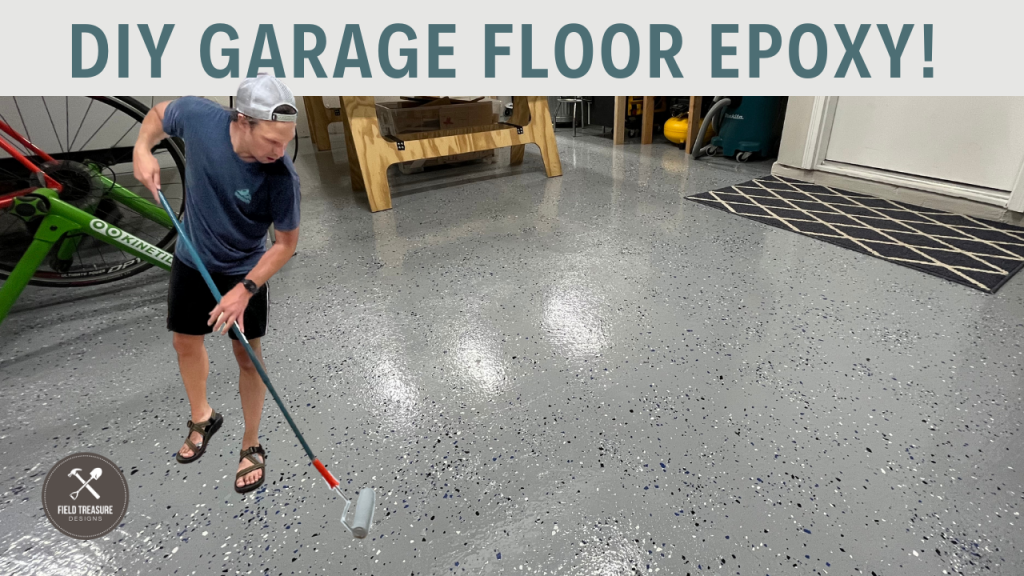
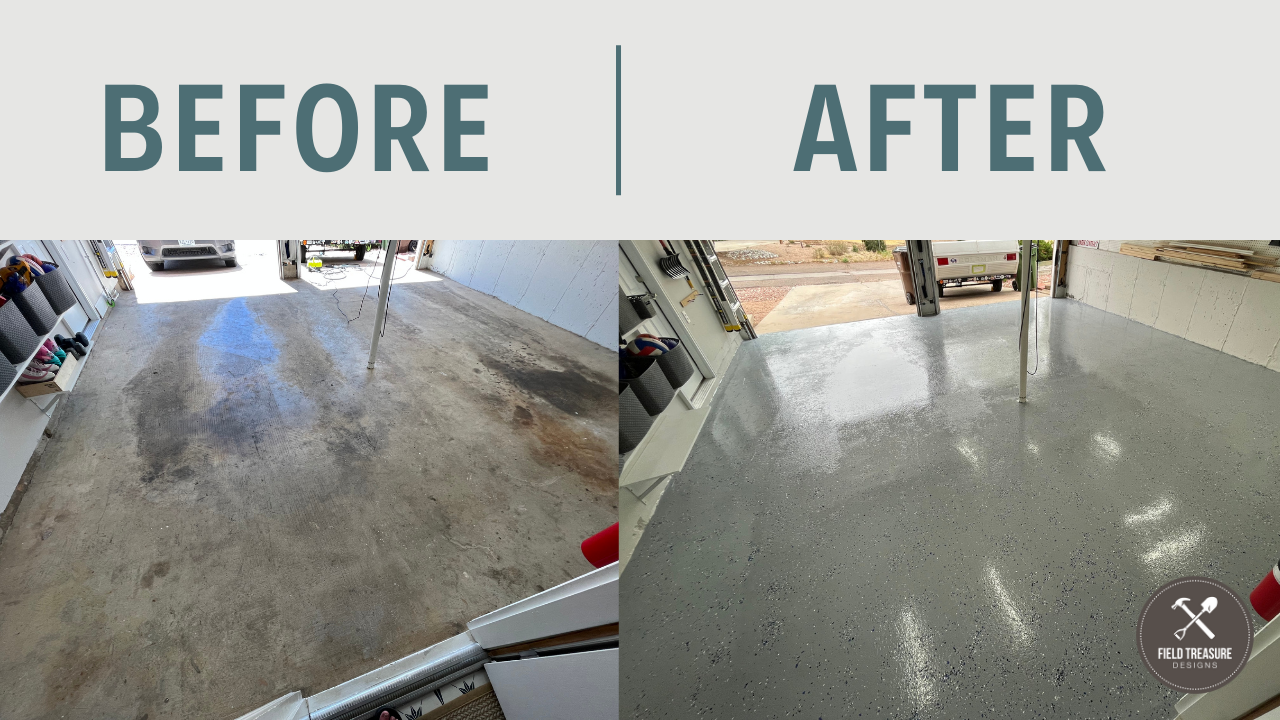
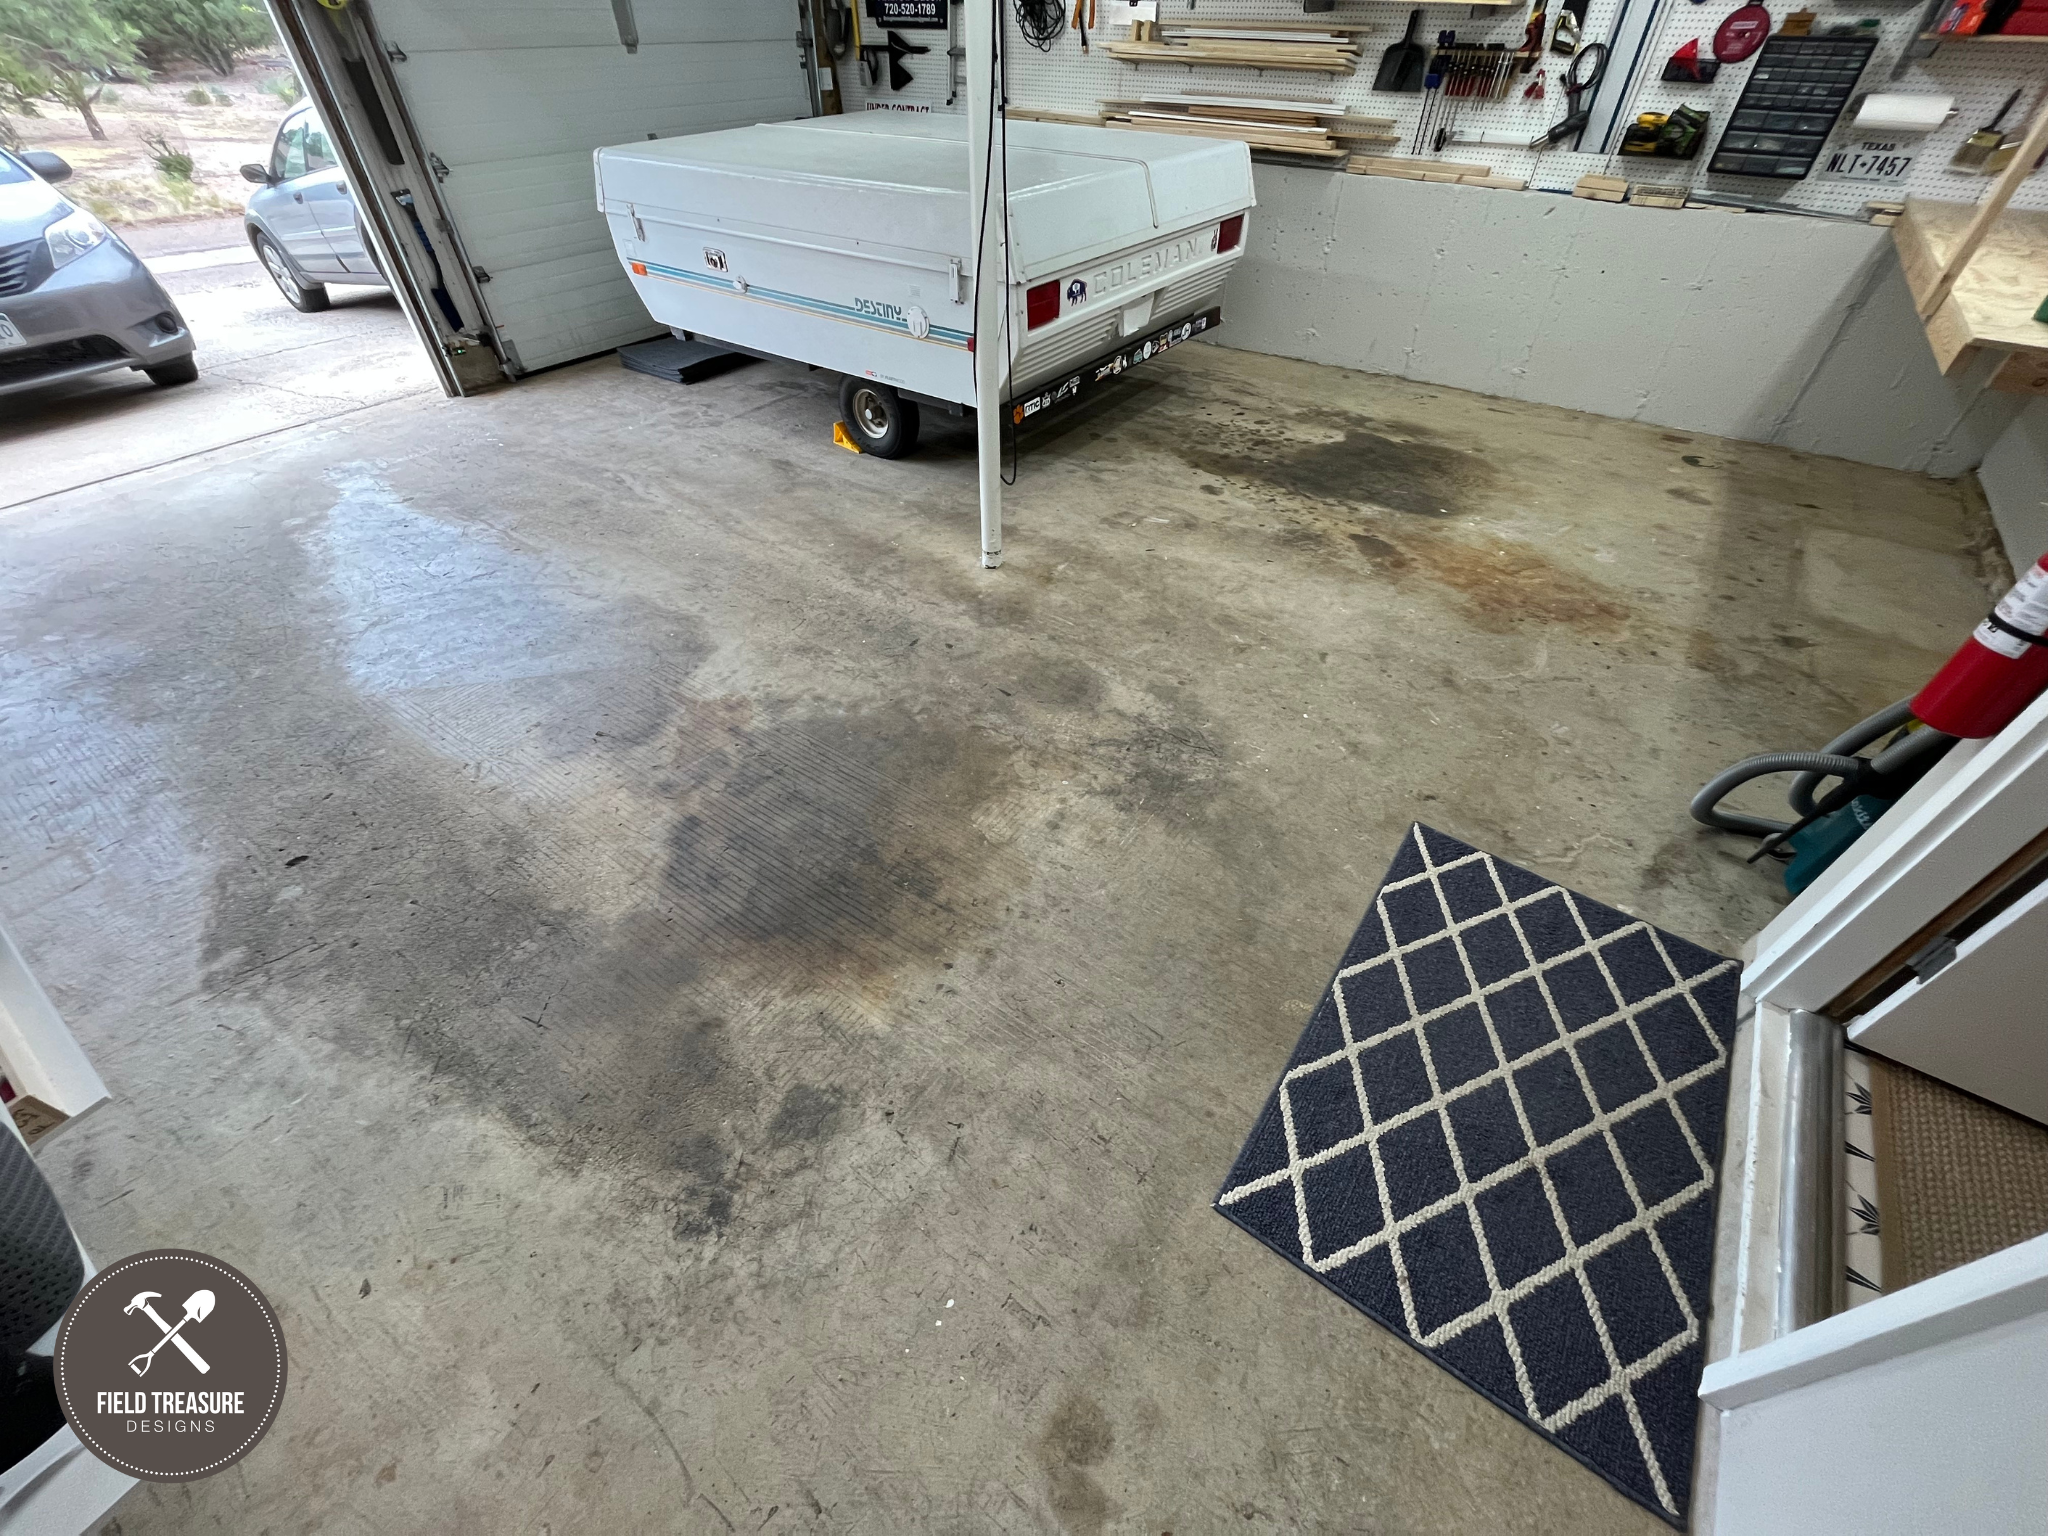
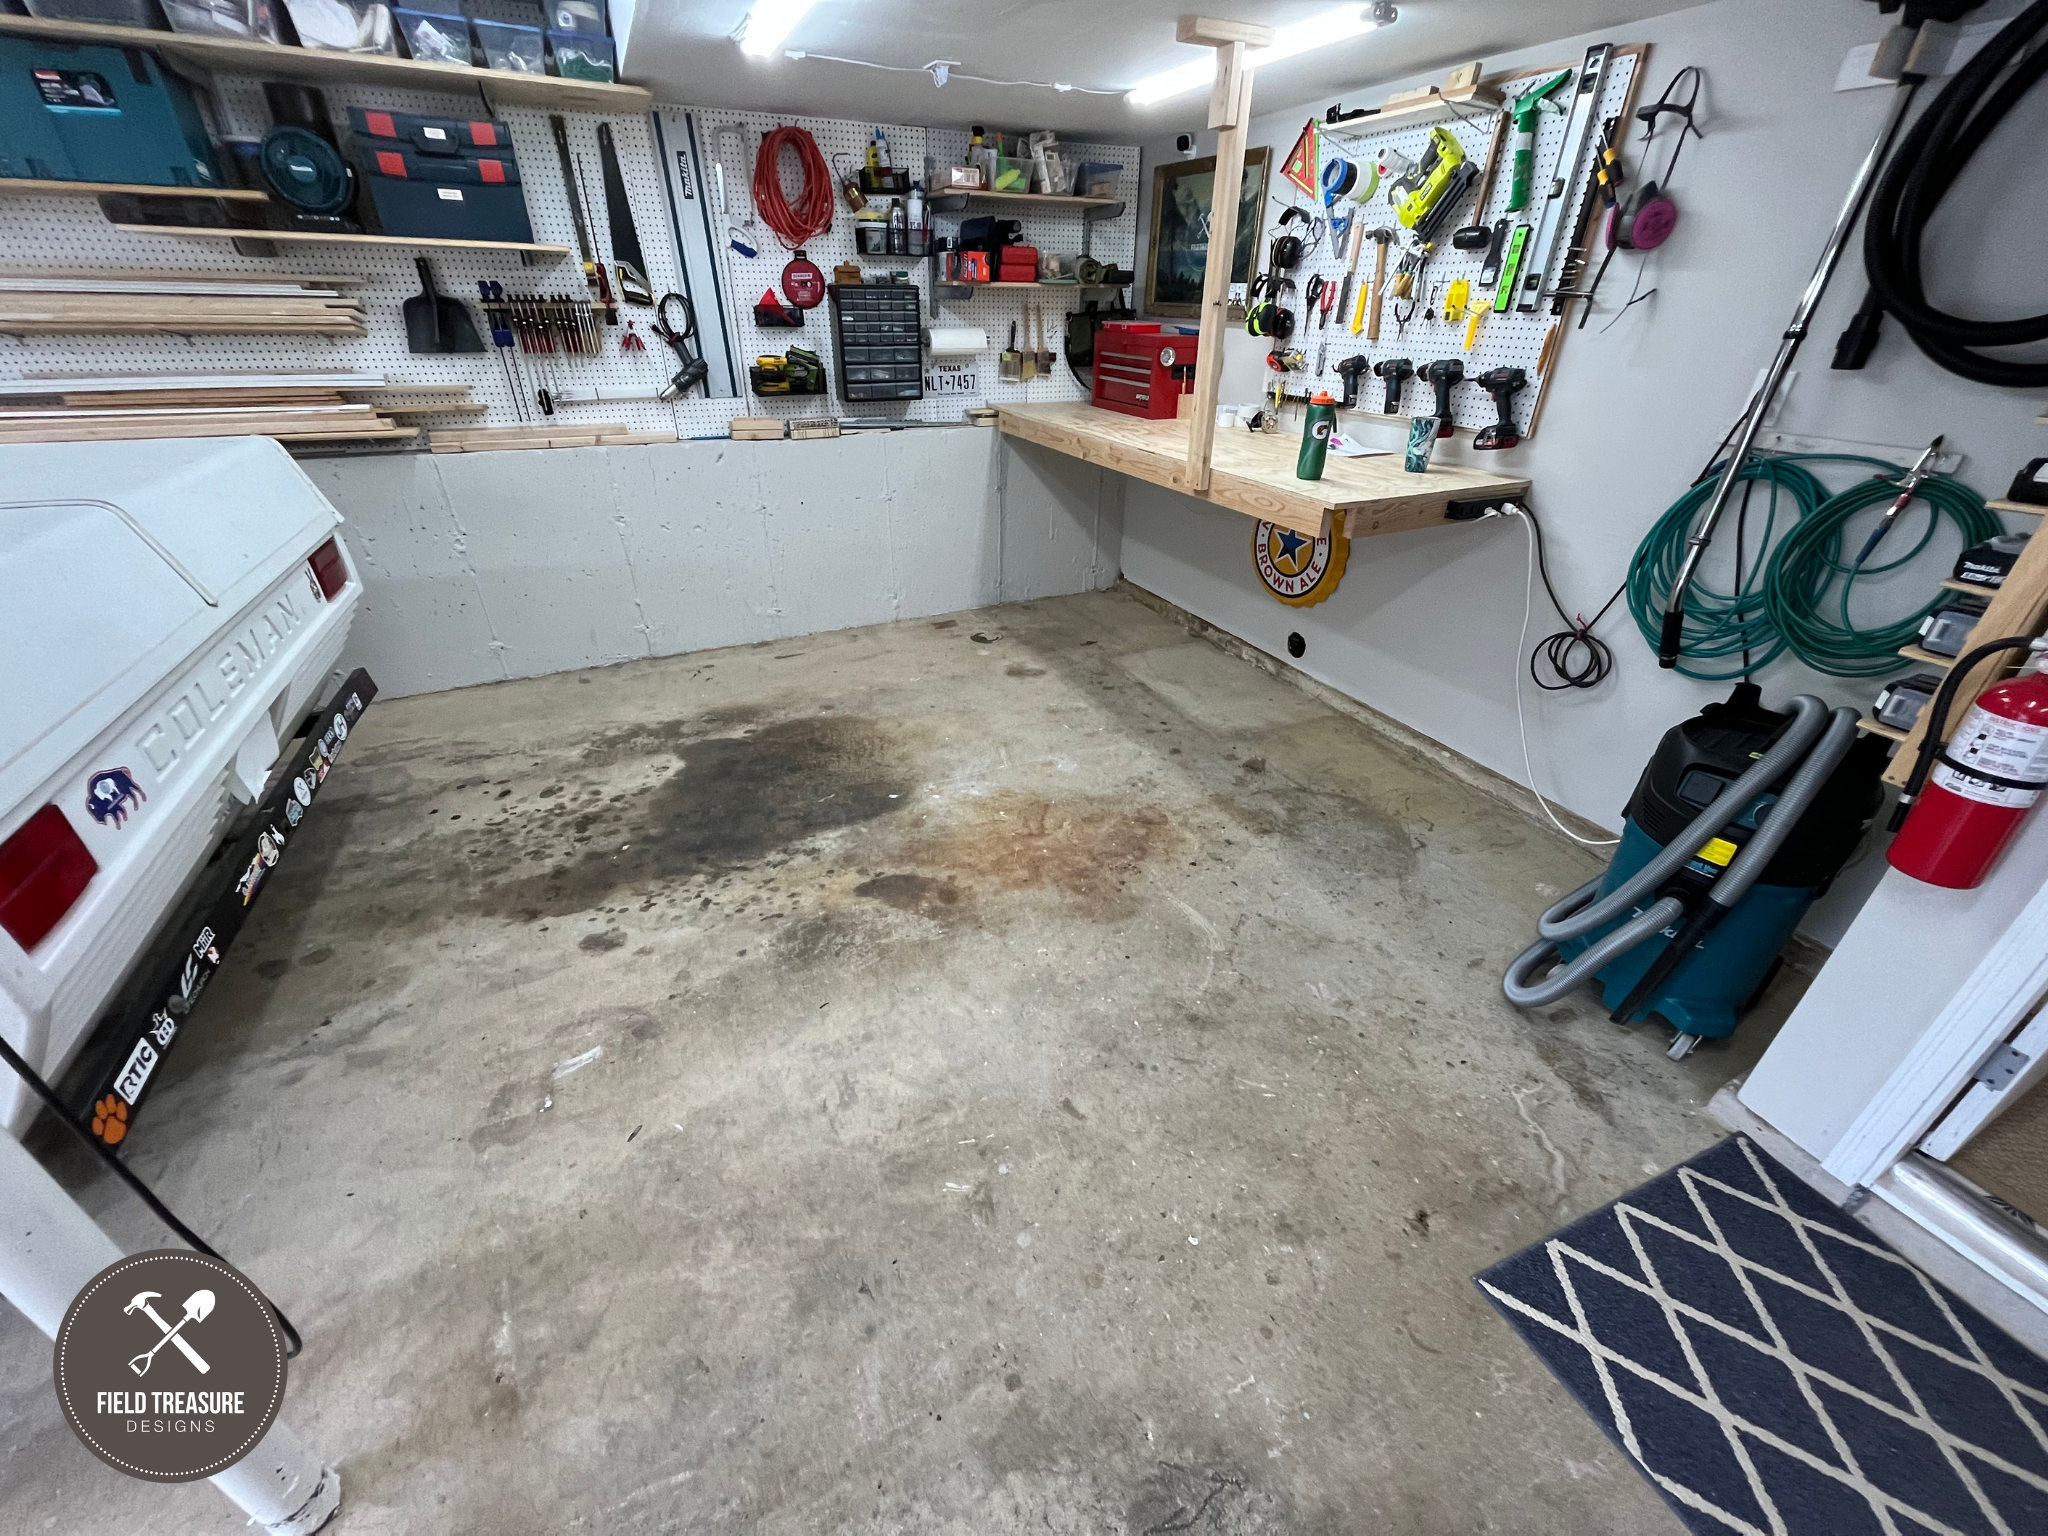
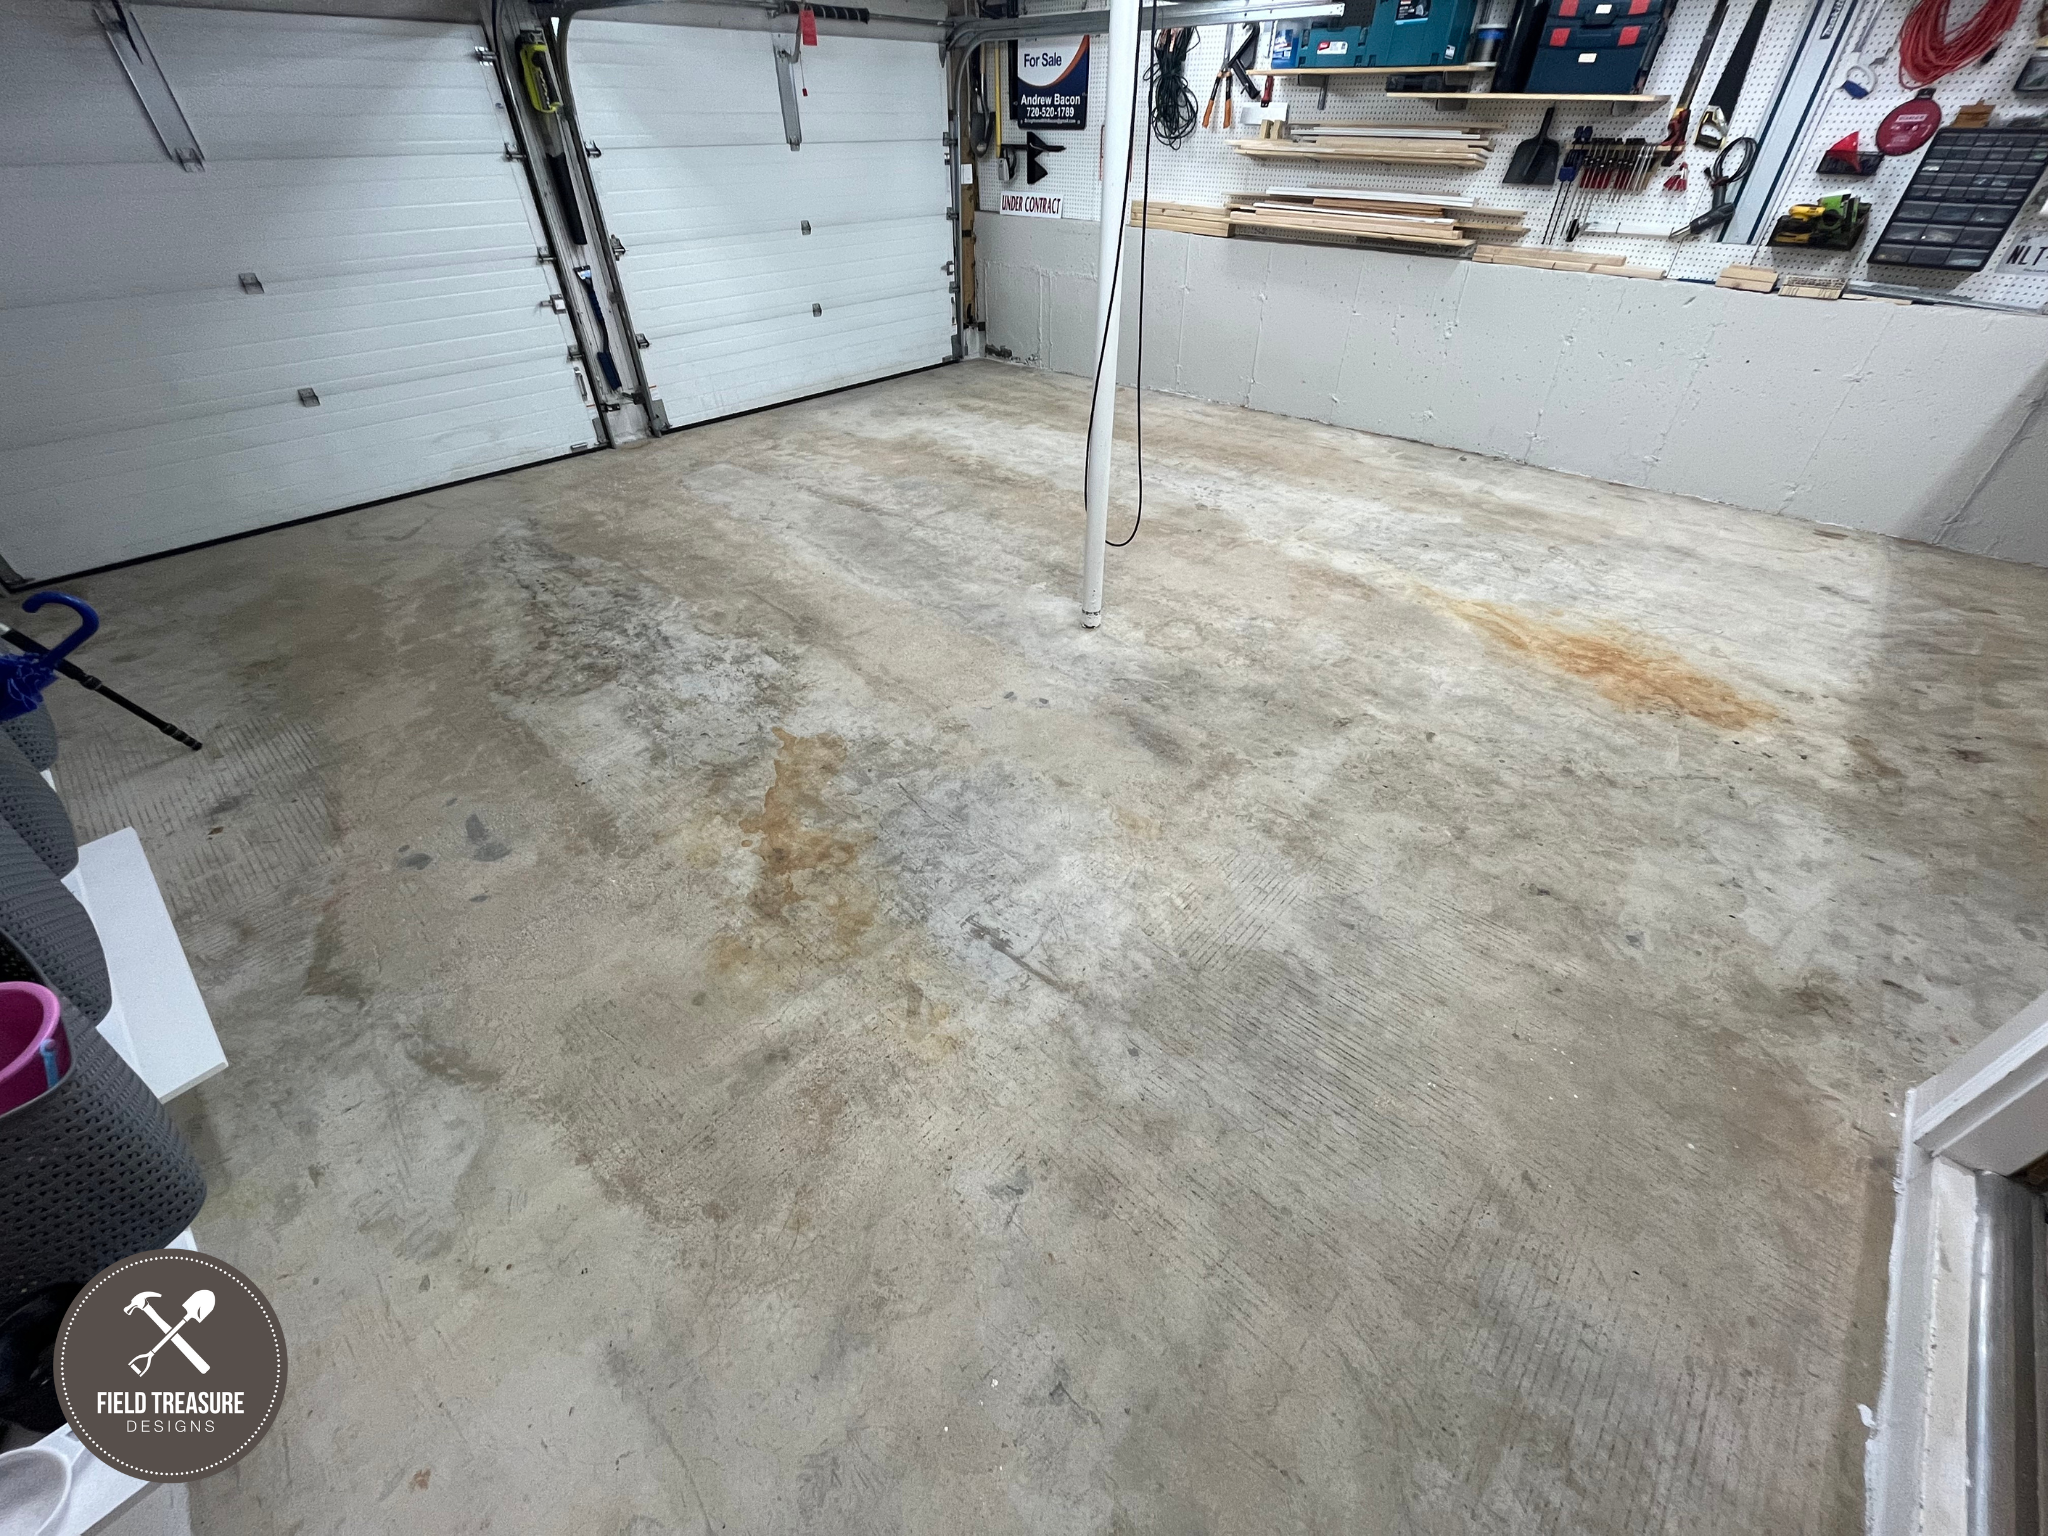
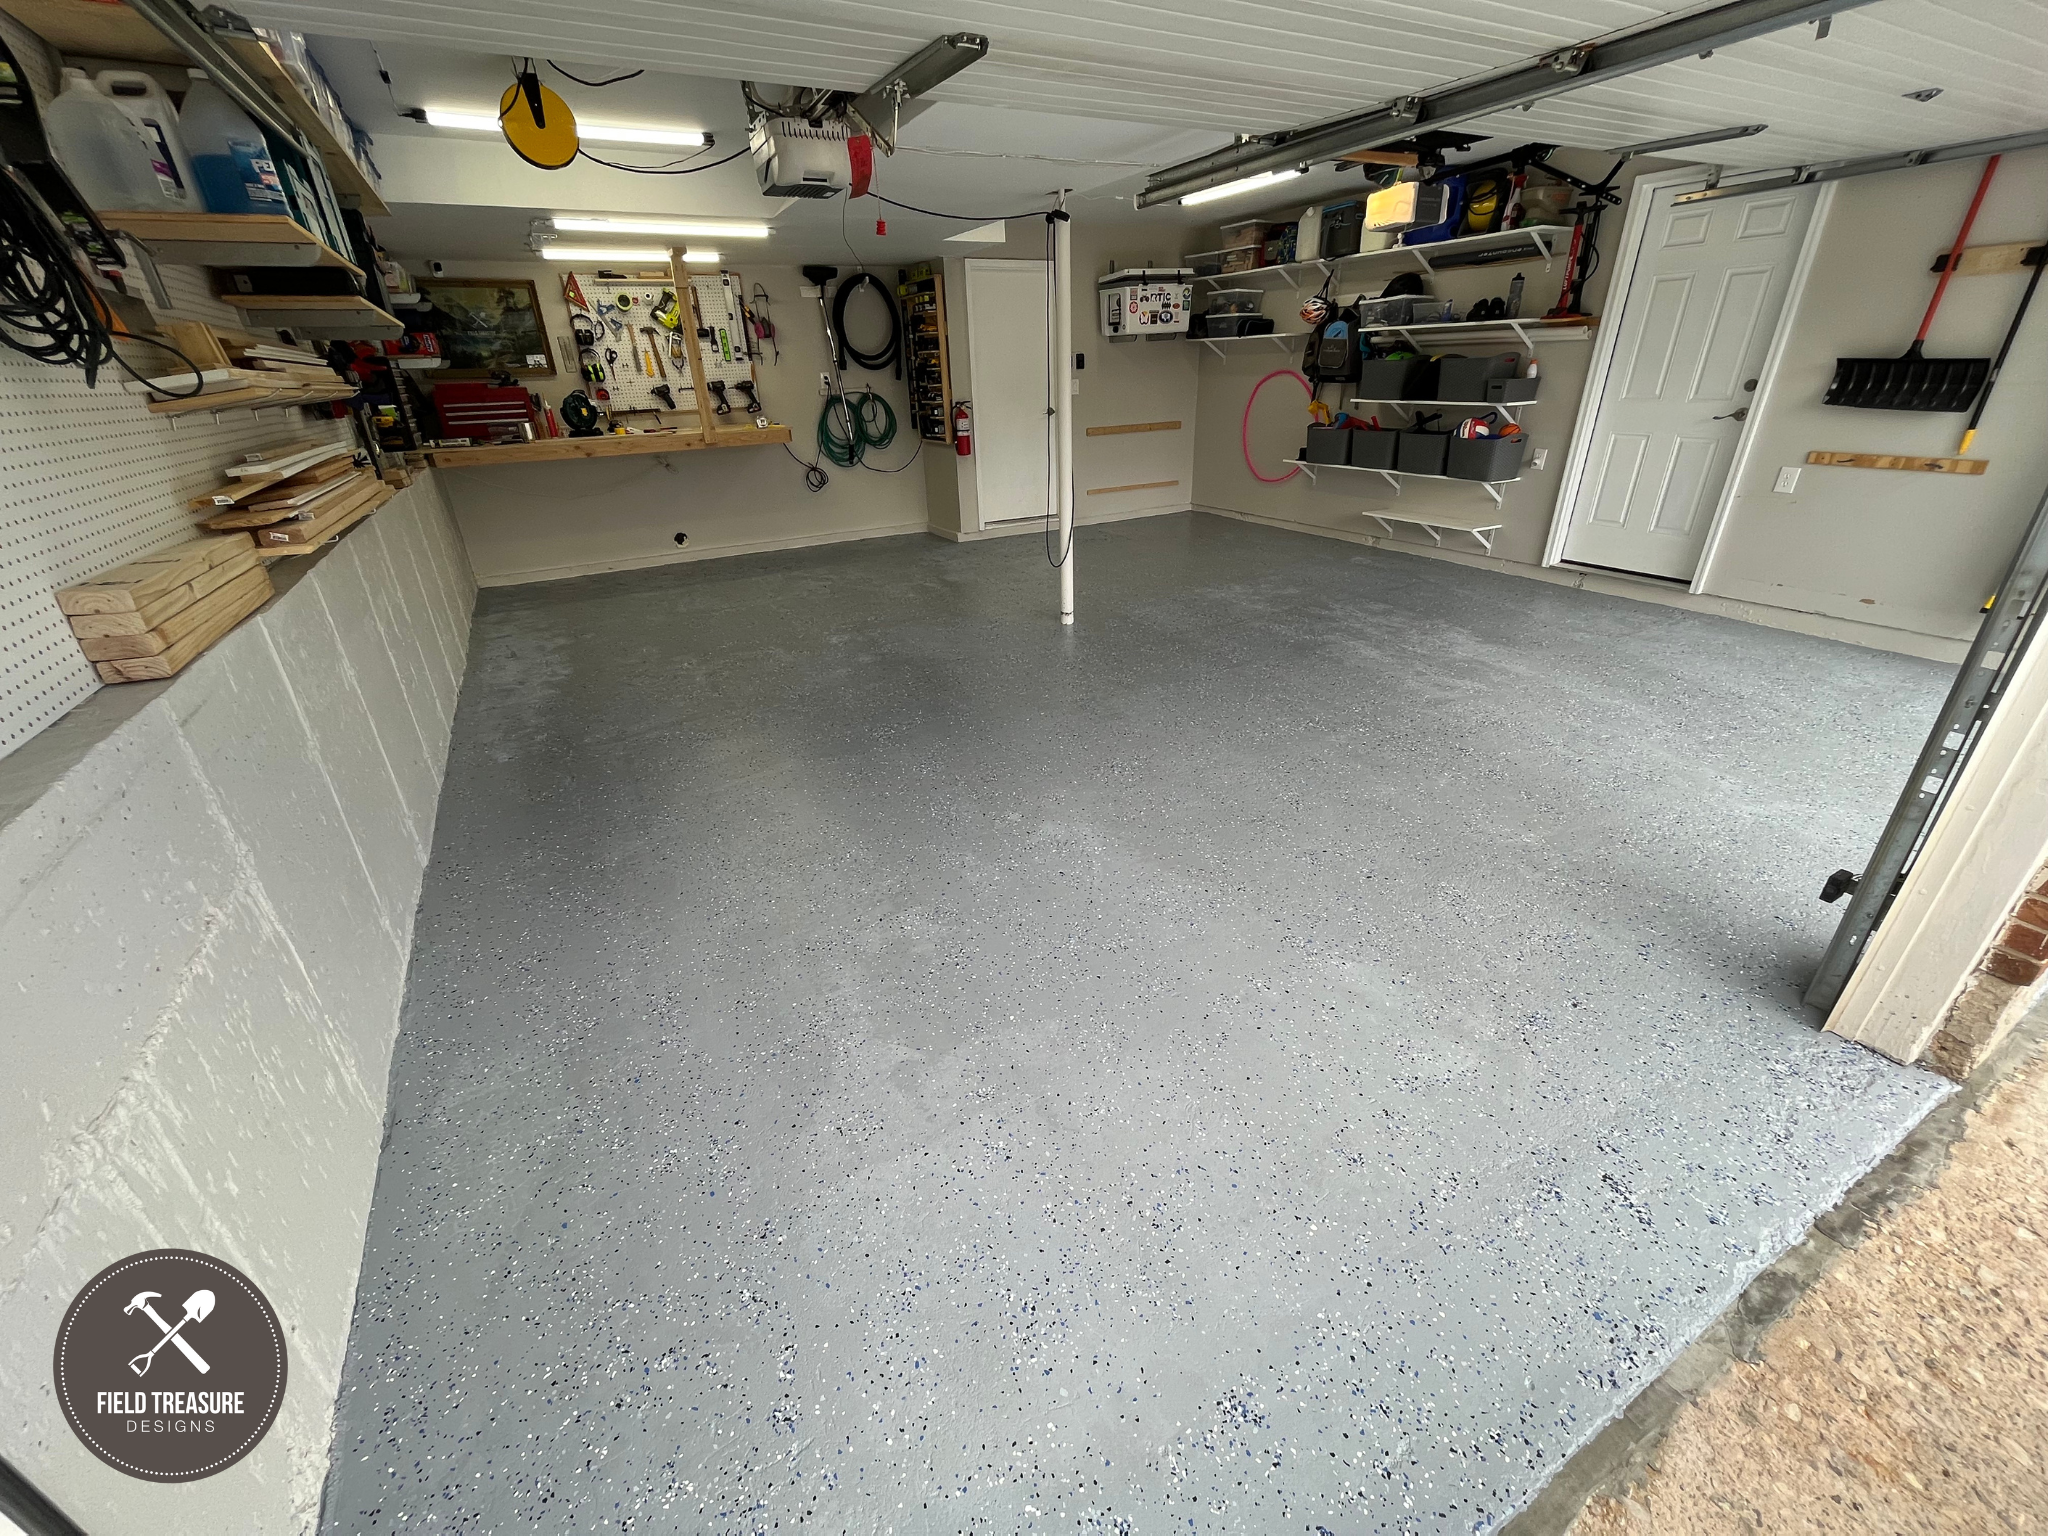
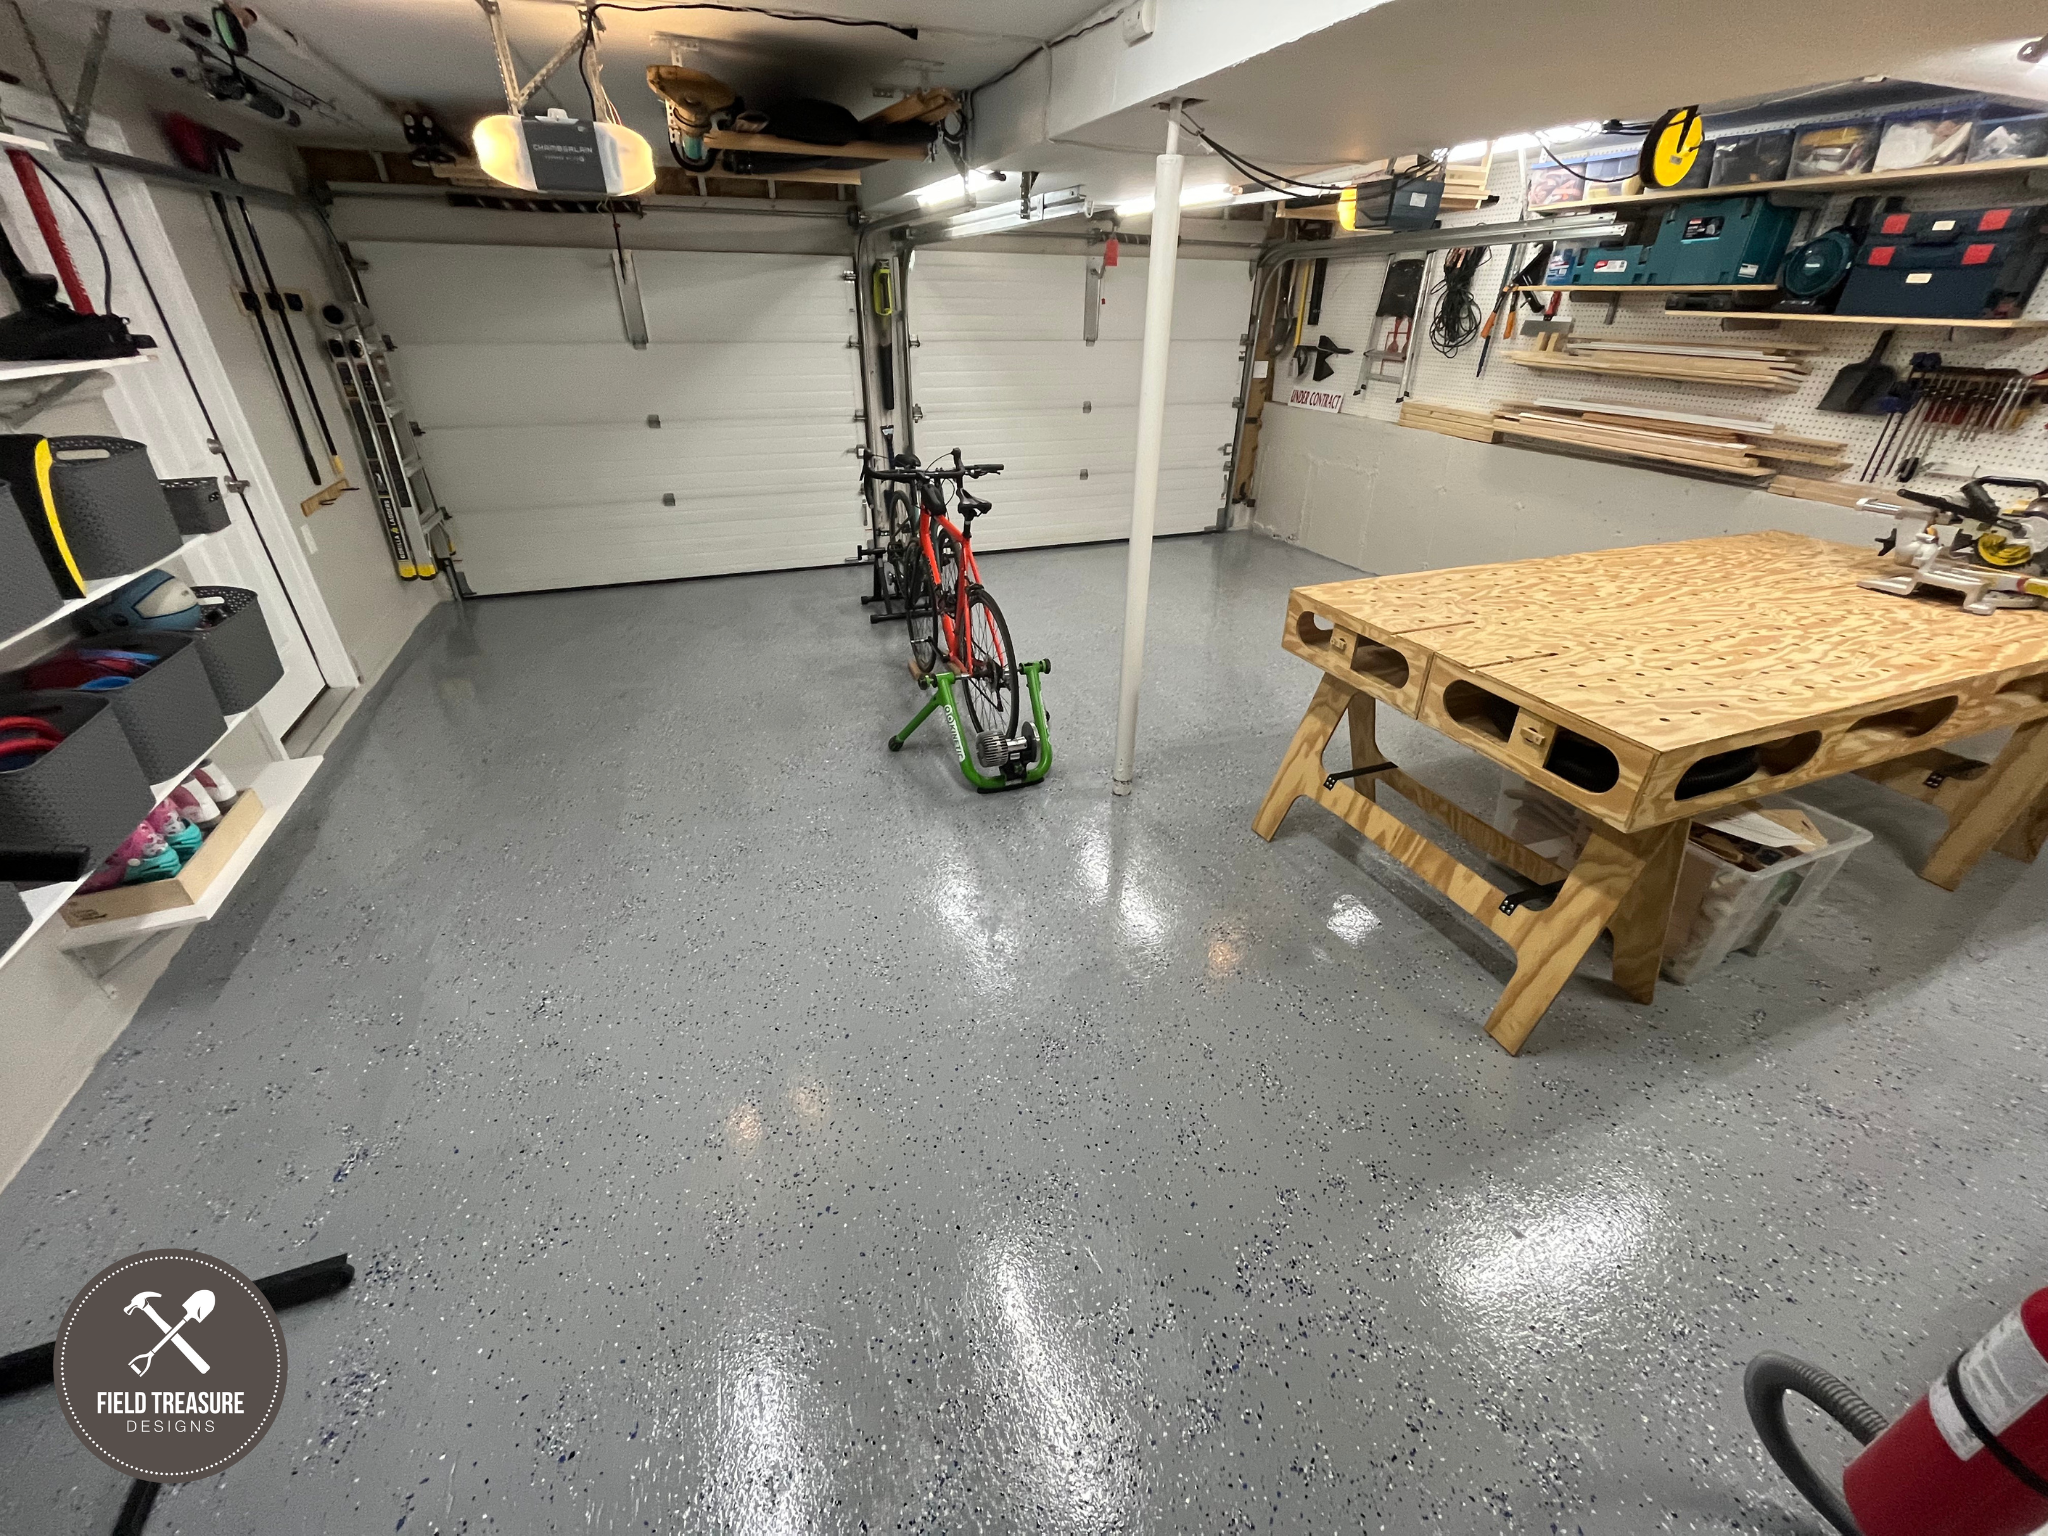
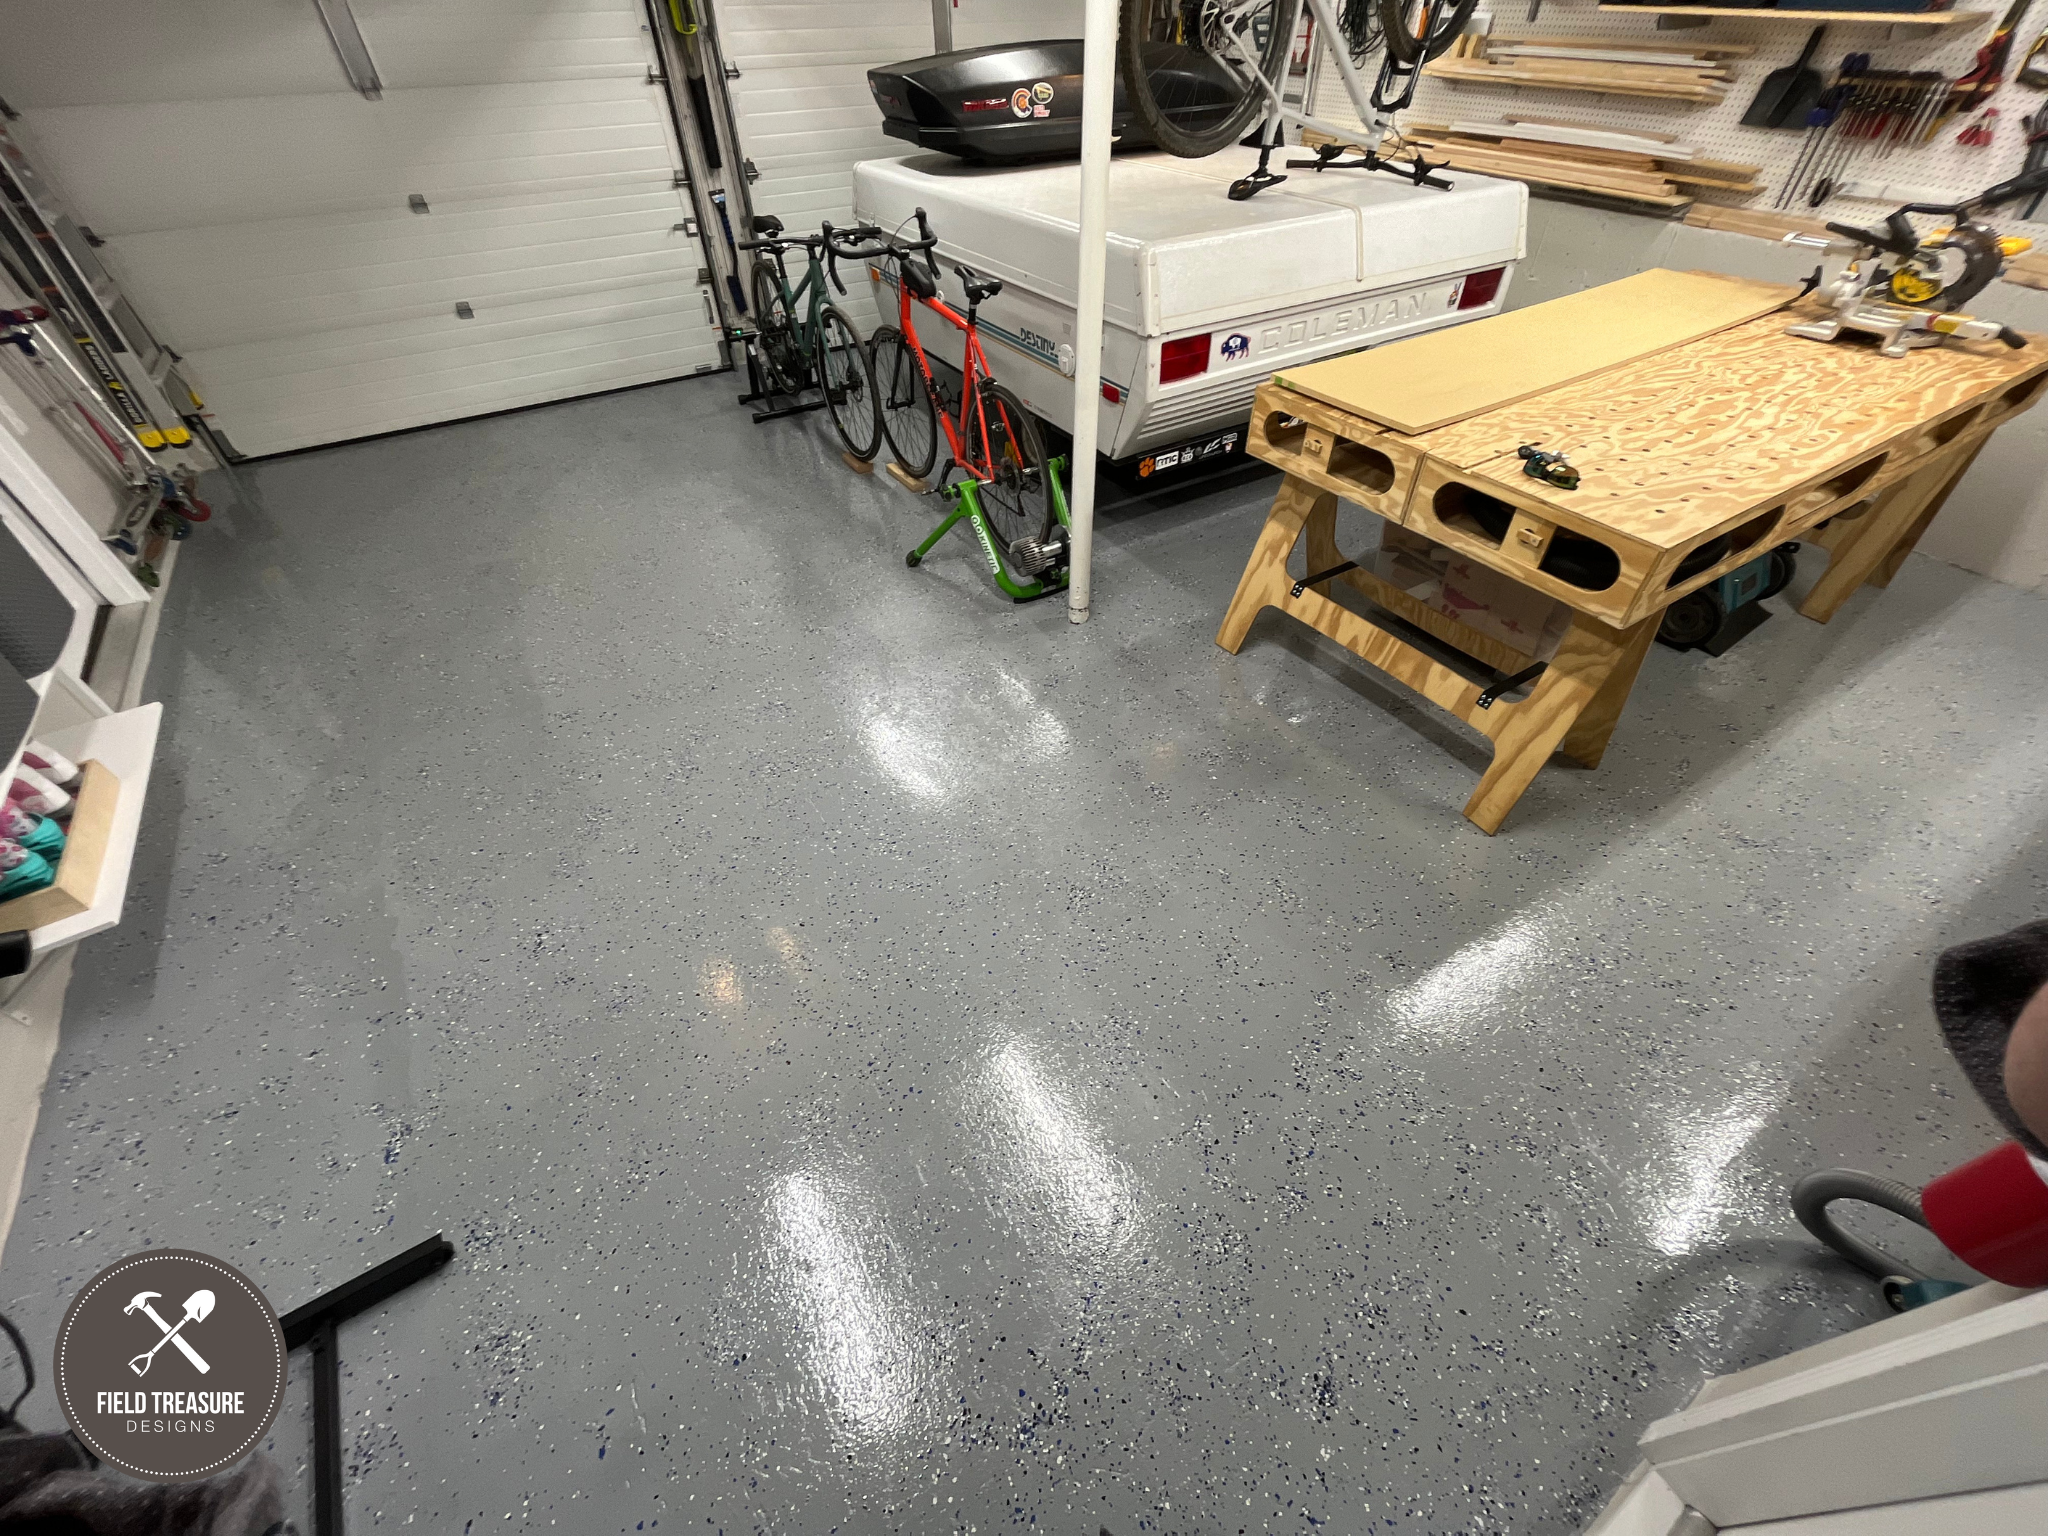
Our garage/workshop floor was NASTY! I have always wanted to do an epoxy floor coating in the garage but honestly, it seemed way to hard to pull off. I finally decided to make it happen and I am excited to say that it worked! I saved a TON of money doing it myself and we couldn’t be happier with the result. We use this area multiple times a day and every time I step foot on it I am thankful I did it. At the end of it all, it only cost me about $800 compared to nearly the $4,000 it would have cost me to have it done. Below, I have a detailed YouTube video, all the steps I followed to complete the project and the links to everything I used. I am certain that you can do it! (PS: This post is brought to you by Swan Bitcoin. Get $10 free here: https://www.swanbitcoin.com/fieldtreasure)
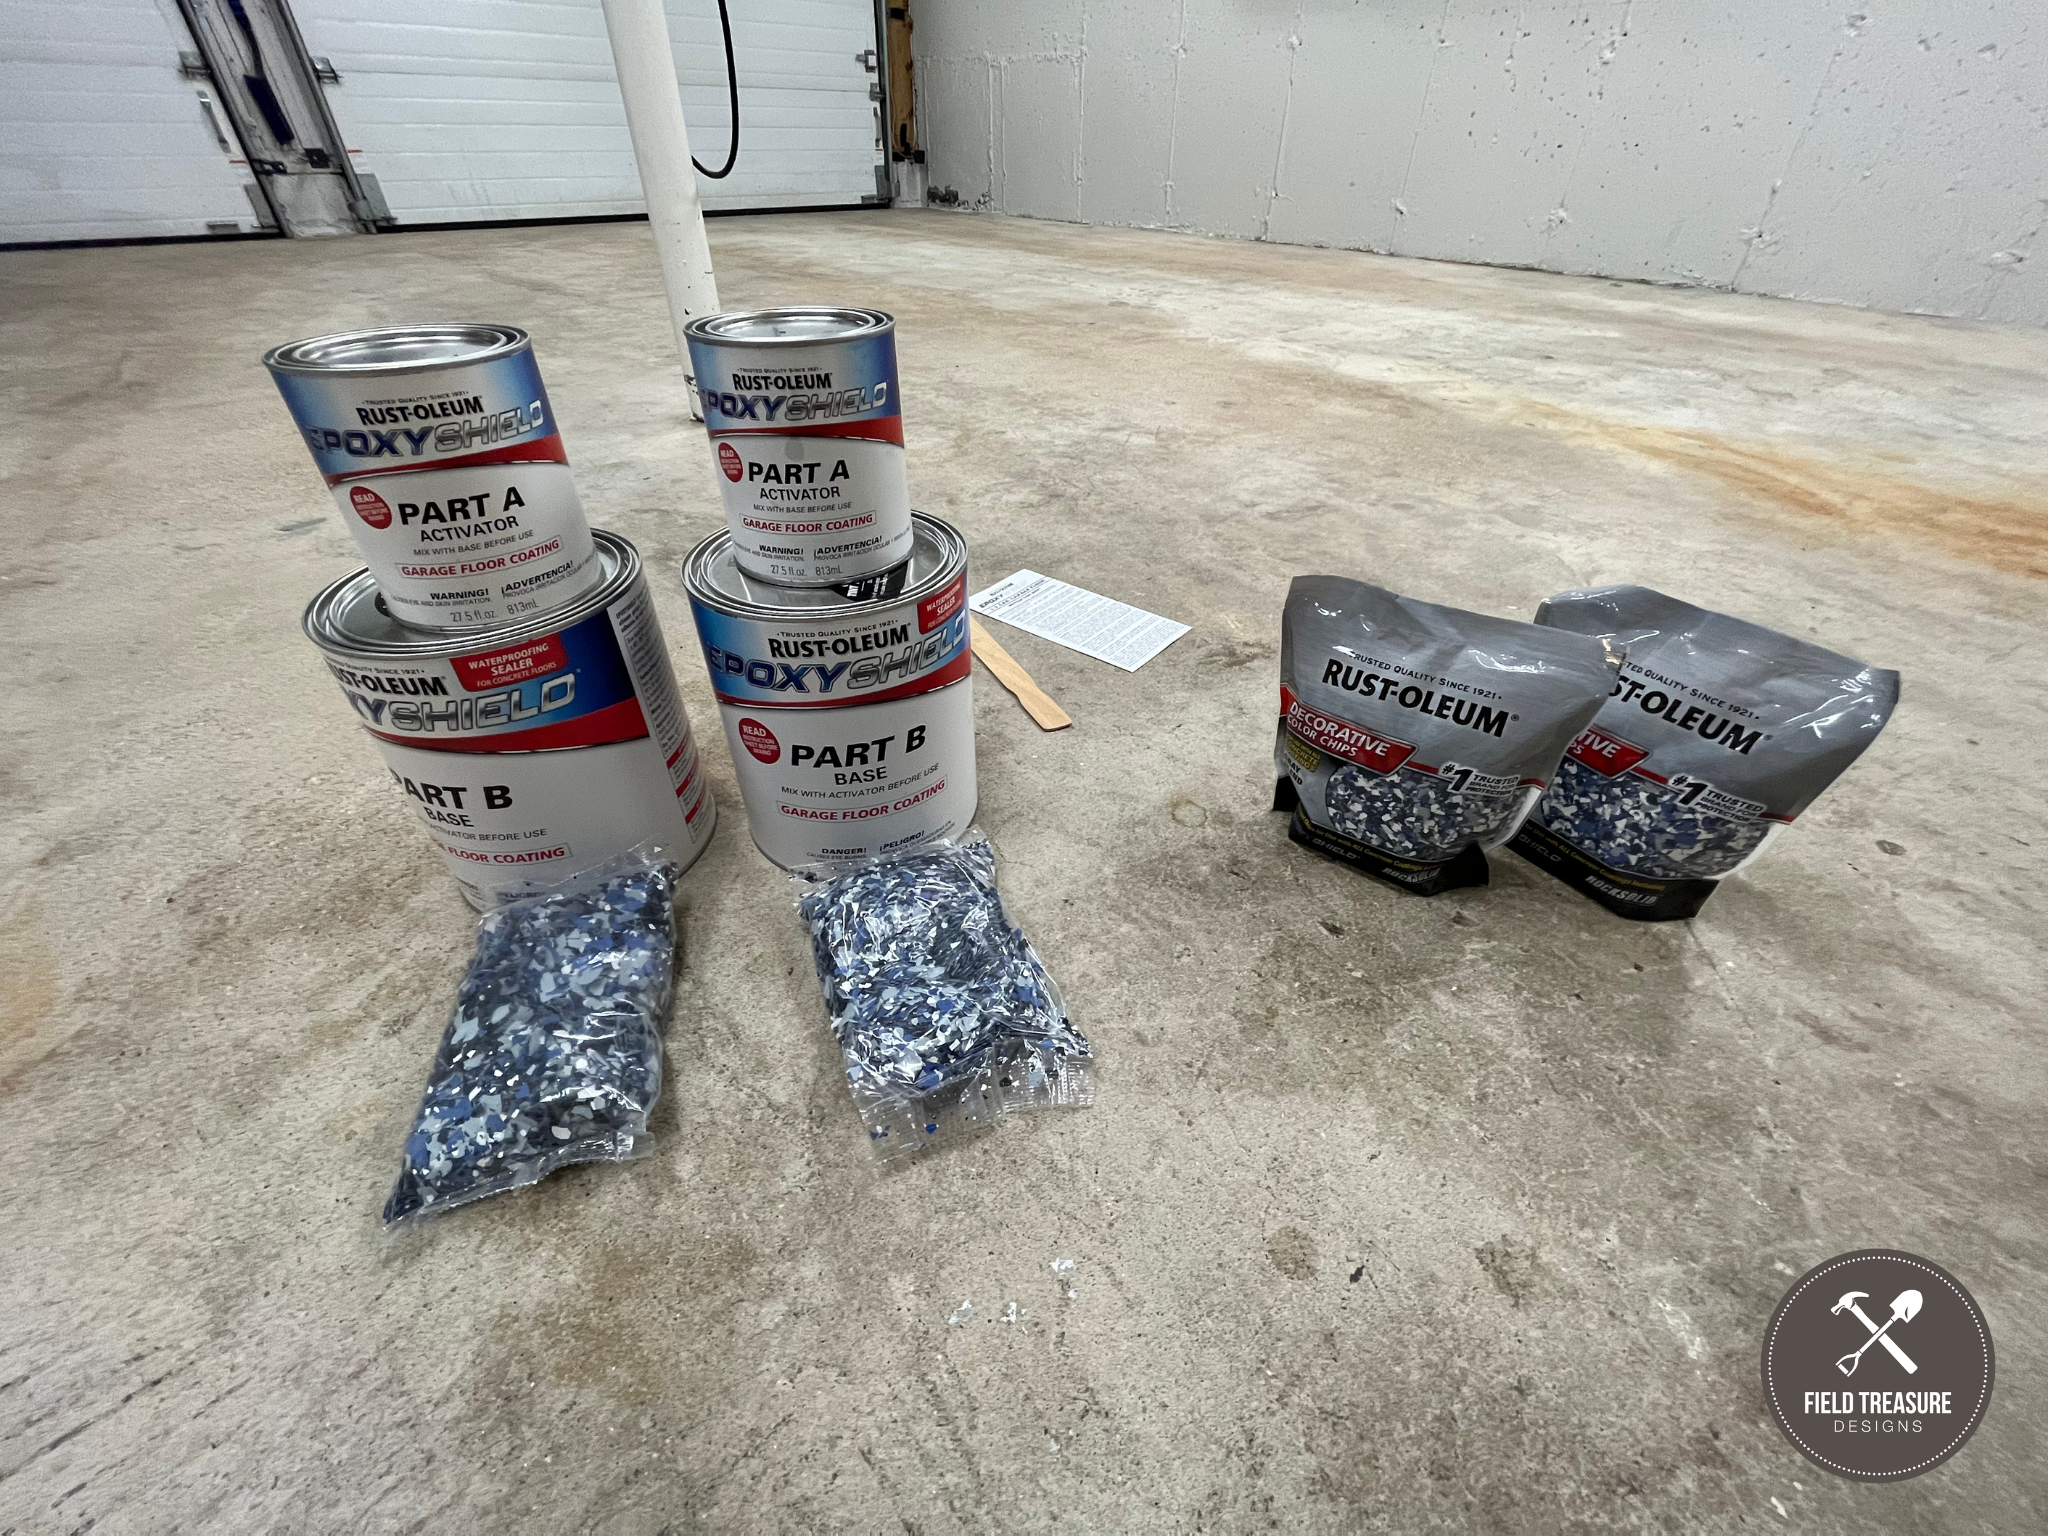
Rust-Oleum EpoxyShield Clear High Gloss Coating: https://low.es/3MDK16b
–
Goof Off Concrete Cleaner & Oil Stain Remover: https://thd.co/3NDuaps
Zep Citrus Degreaser: https://amzn.to/3zpMIW1
Drylok Concrete Etch & Cleaner: https://thd.co/3O43oGG
Quikcrete Quick-setting Concrete Mix: https://thd.co/3aLhuOF
Ryobi Pressure Washer: https://amzn.to/3wUcmiN (Amazon)
Ryobi Pressure Washer: https://thd.co/3N4D6Ur (Home Depot)
Quickie Outdoor Scrub Brush: https://amzn.to/39cWCj6
Brush Extension Pole (Don’t be cheap as I broke one): https://amzn.to/3MDZaUO
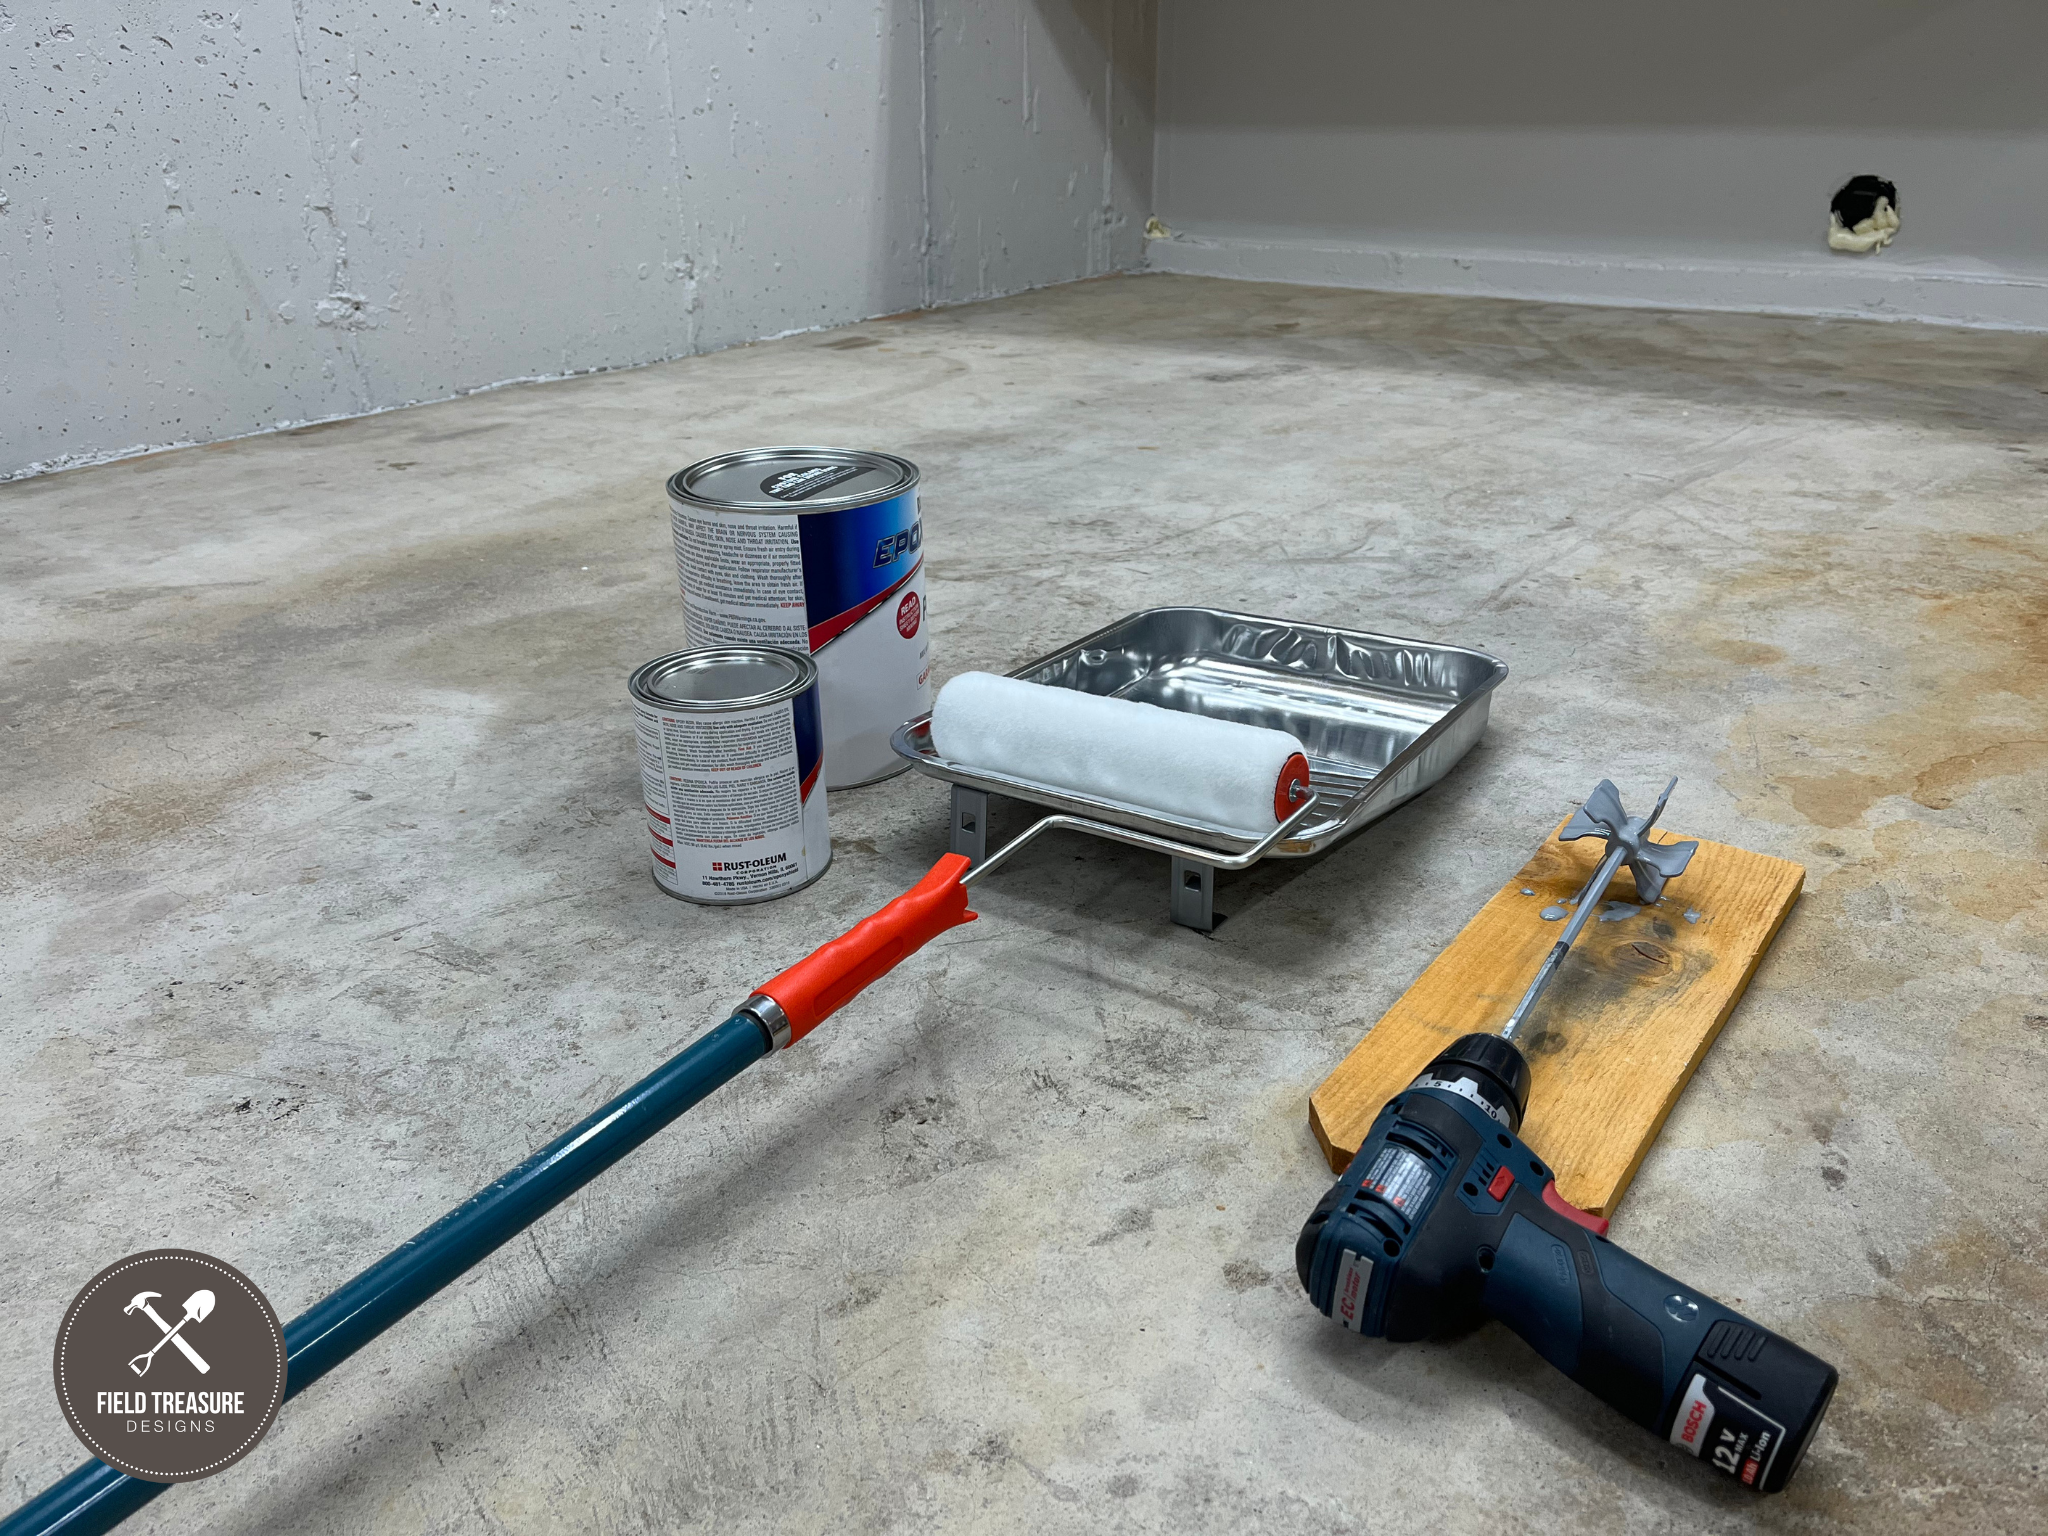
Drill Attachment Paint/Epoxy Mixer: https://amzn.to/3MFNalM
Roller Brush Frame: https://amzn.to/3aDoltv
3/8 Nap Roller Brush: https://amzn.to/3xBCxw9
Angle Paint Brush: https://amzn.to/3QeYDfi
Paint Tray: https://amzn.to/3mvLUqO
Ryobi Blower: https://amzn.to/3O4fMWZ
Painters Tape: https://amzn.to/3H6iR6R
Margin Trowel: https://amzn.to/3O8VsUG
Bosch Random Orbit Sander: https://amzn.to/3MBg8U6
Mechanix Work Gloves: https://amzn.to/3NG4Wqz
///// PHOTO, VIDEO & EDITING I USE
Canon 80D Camera: https://amzn.to/2VHhzab
Canon 10-18mm Wide Lens: https://amzn.to/2CNa2zh
Canon 50mm Lens: https://amzn.to/2COnzq8
Canon 18-55mm Lens: https://amzn.to/2Mepfwo
Rode Video Mic: https://amzn.to/2VIBR2V
iPhone 13: https://amzn.to/3s1Vp3y
Tripod: https://amzn.to/2R9Qq12
iPhone Tripod Mount: https://amzn.to/2SzTd09
Recording to iPhone: https://amzn.to/2C0UshJ
iMac: https://amzn.to/2VrstAJ
Video Editing Software: https://amzn.to/3rhgvMa
Blue Yeti Mic for recording to computer: https://amzn.to/3HnXBsE
STEP 1: Remove all the stuff on the floor and take low hanging items off the walls.
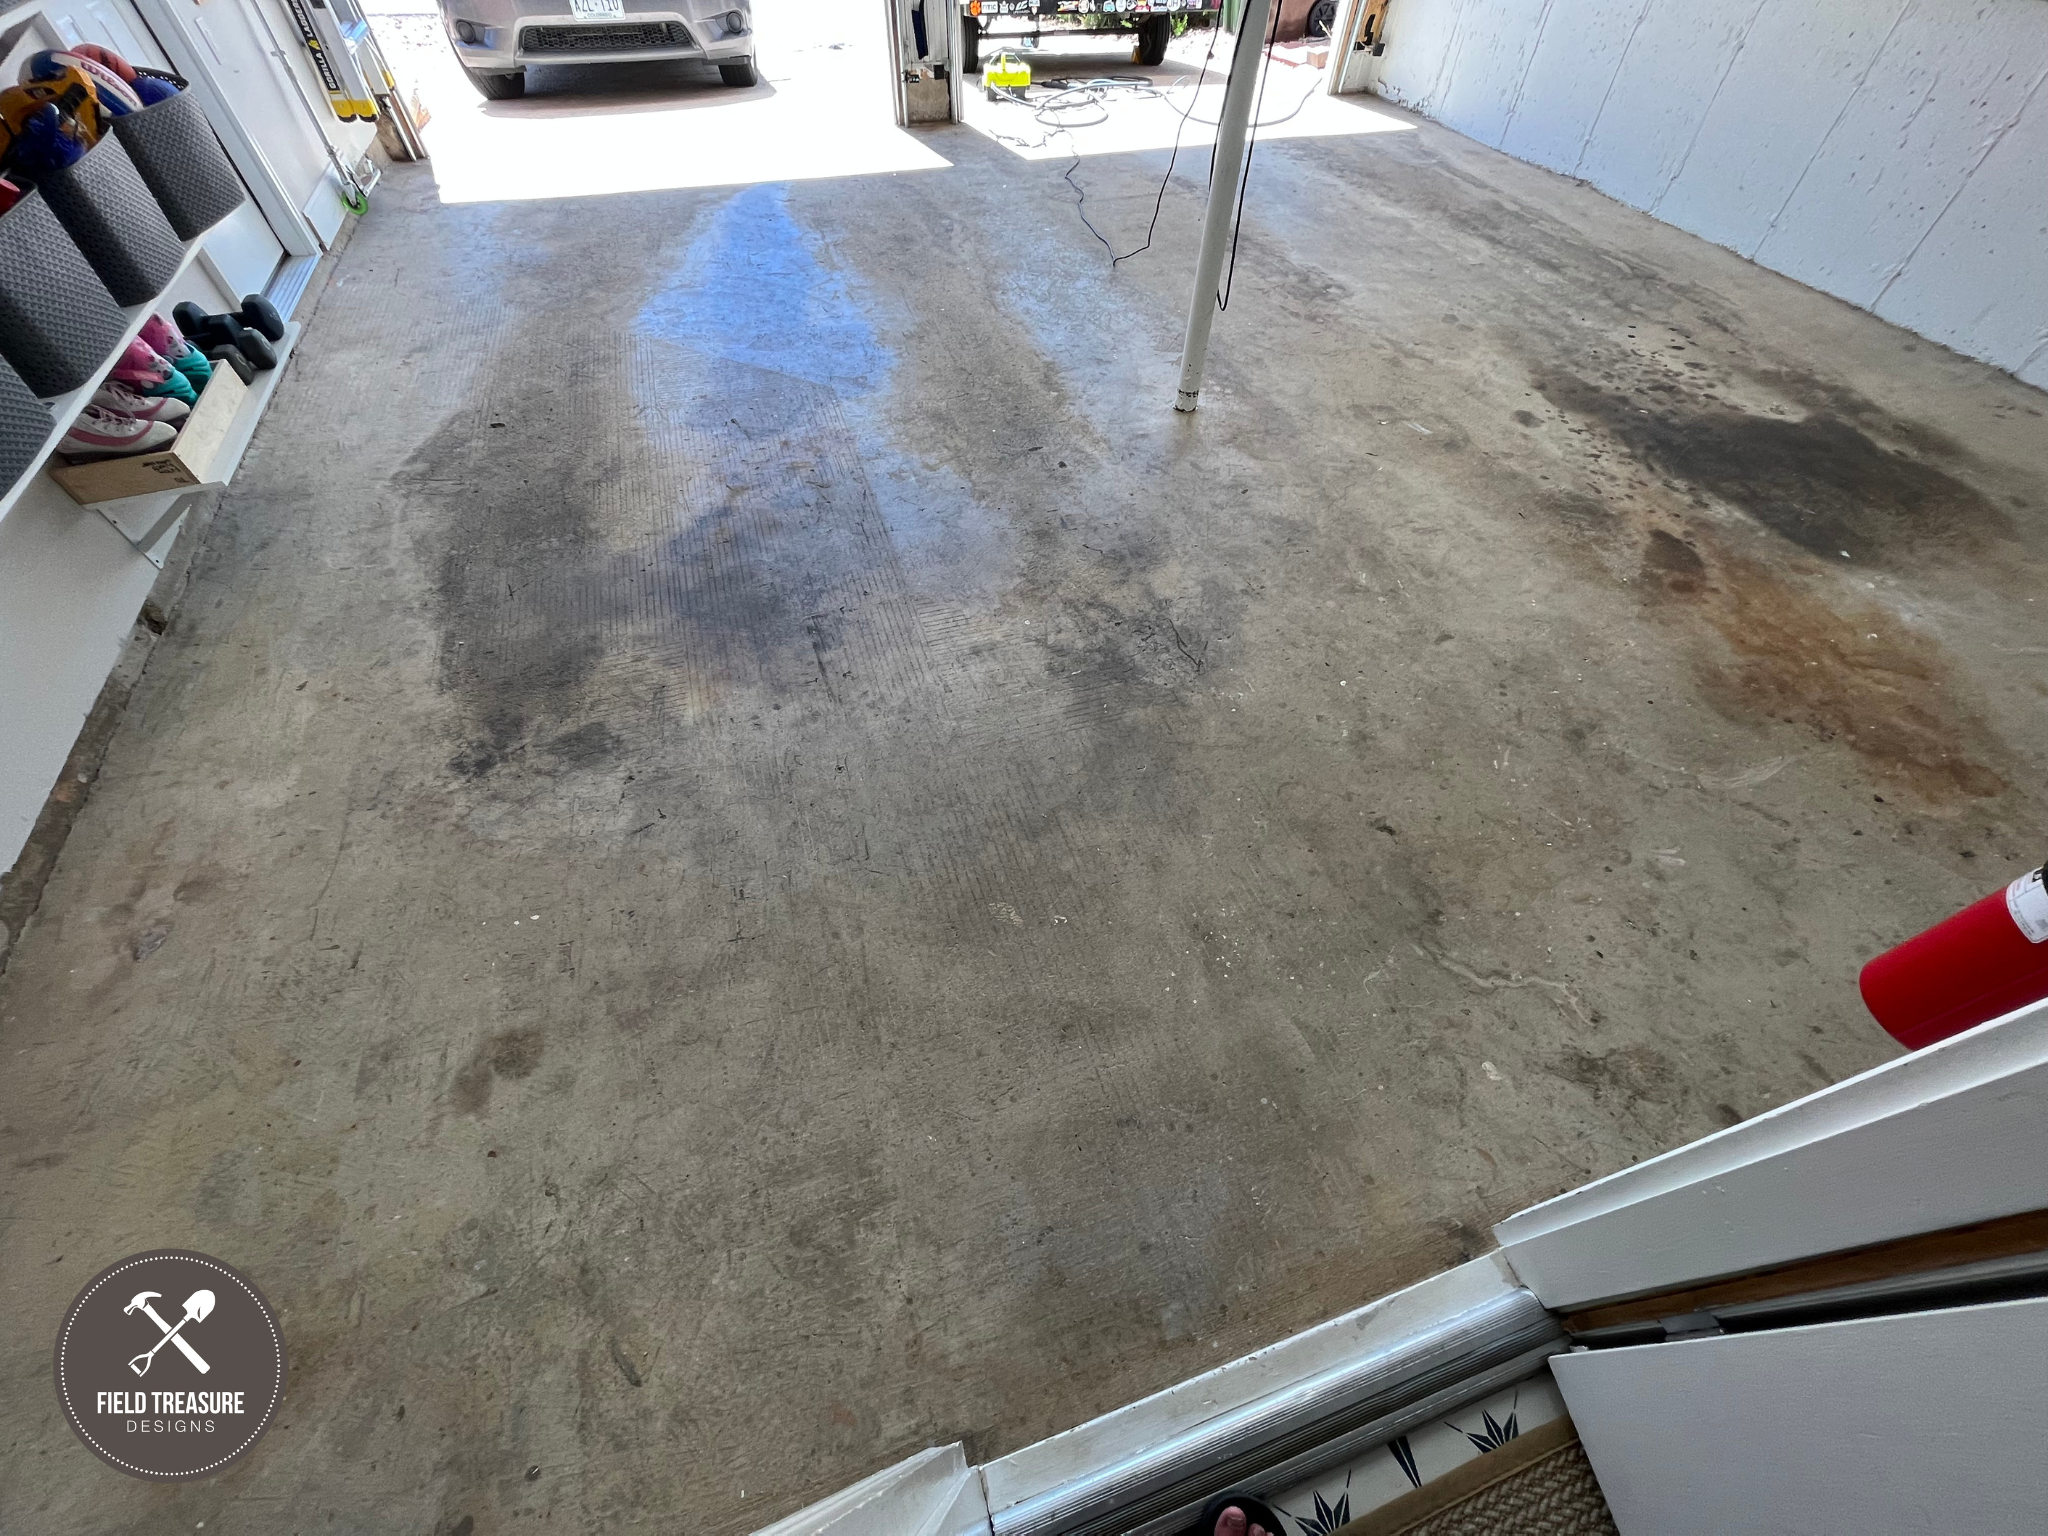
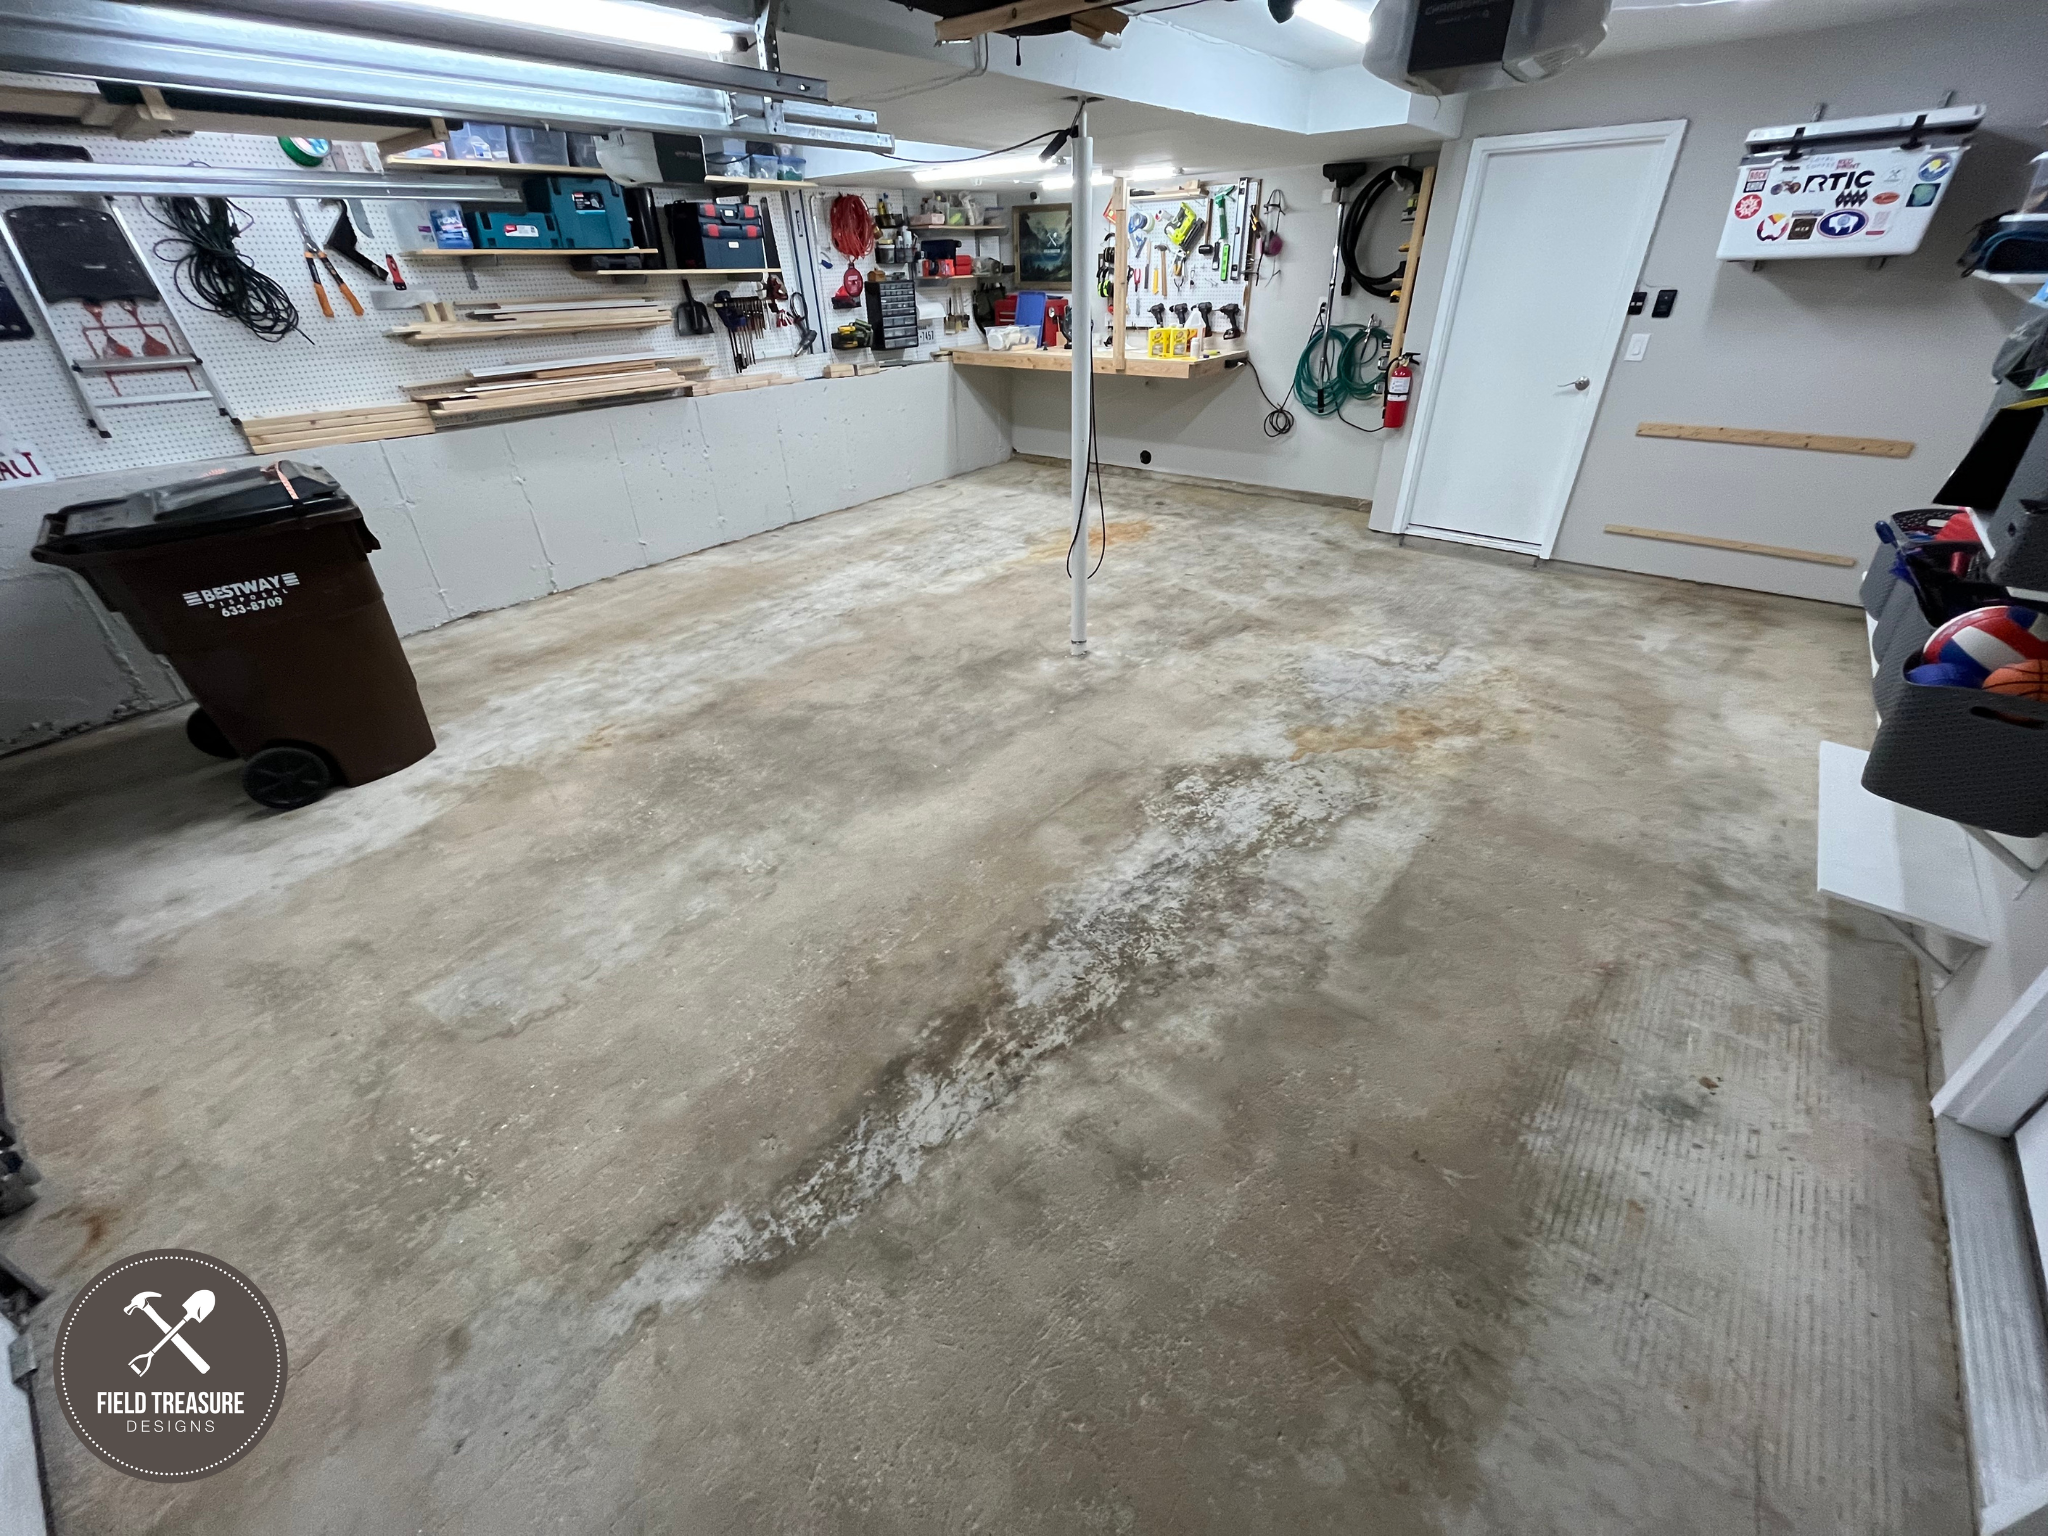
STEP 2: Pressure Wash the entire floor. Let dry.
STEP 3: Apply stain remover to tough spots or entire surface (I recommend entire surface). Then pressure wash.
STEP 4: Apply degreaser to tough pots or entire surface (again, I recommend entire surface). Then pressure wash.
STEP 5: Apply concrete etching to entire surface. Then pressure wash.
STEP 6: Let dry for 48 hours.
STEP 6a: Use this time to apply quikrete, great stuff to fill gaps, caulk, and primer/paint to all areas of need.
STEP 6b: Sand quikrete areas and finalize all paint touchups.
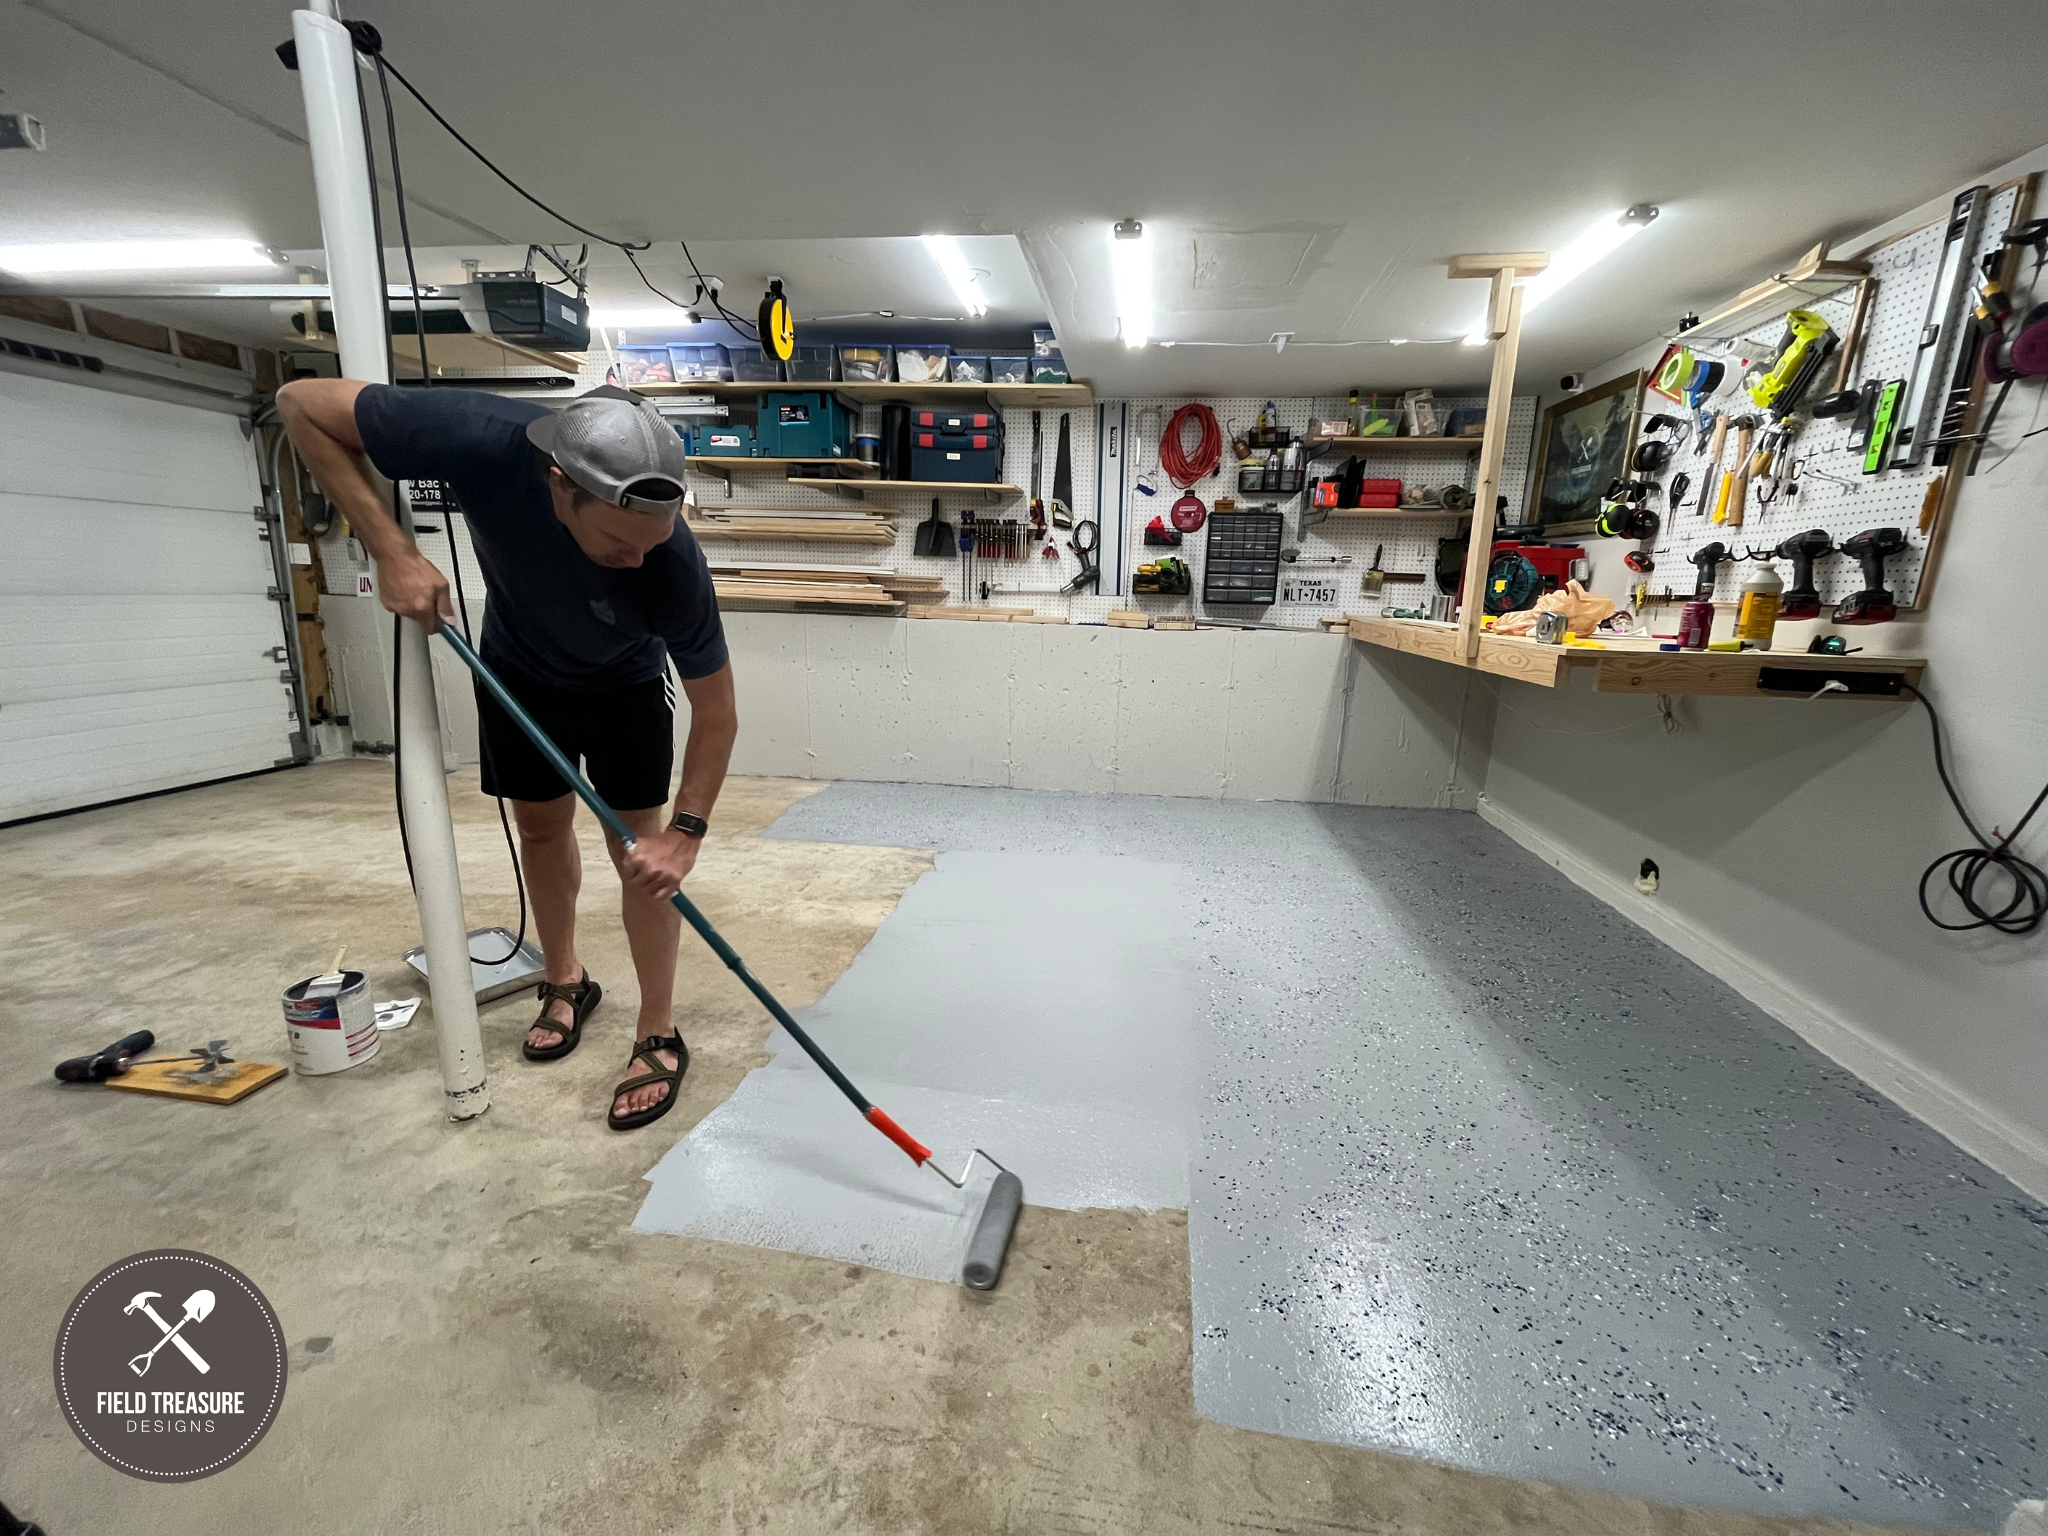
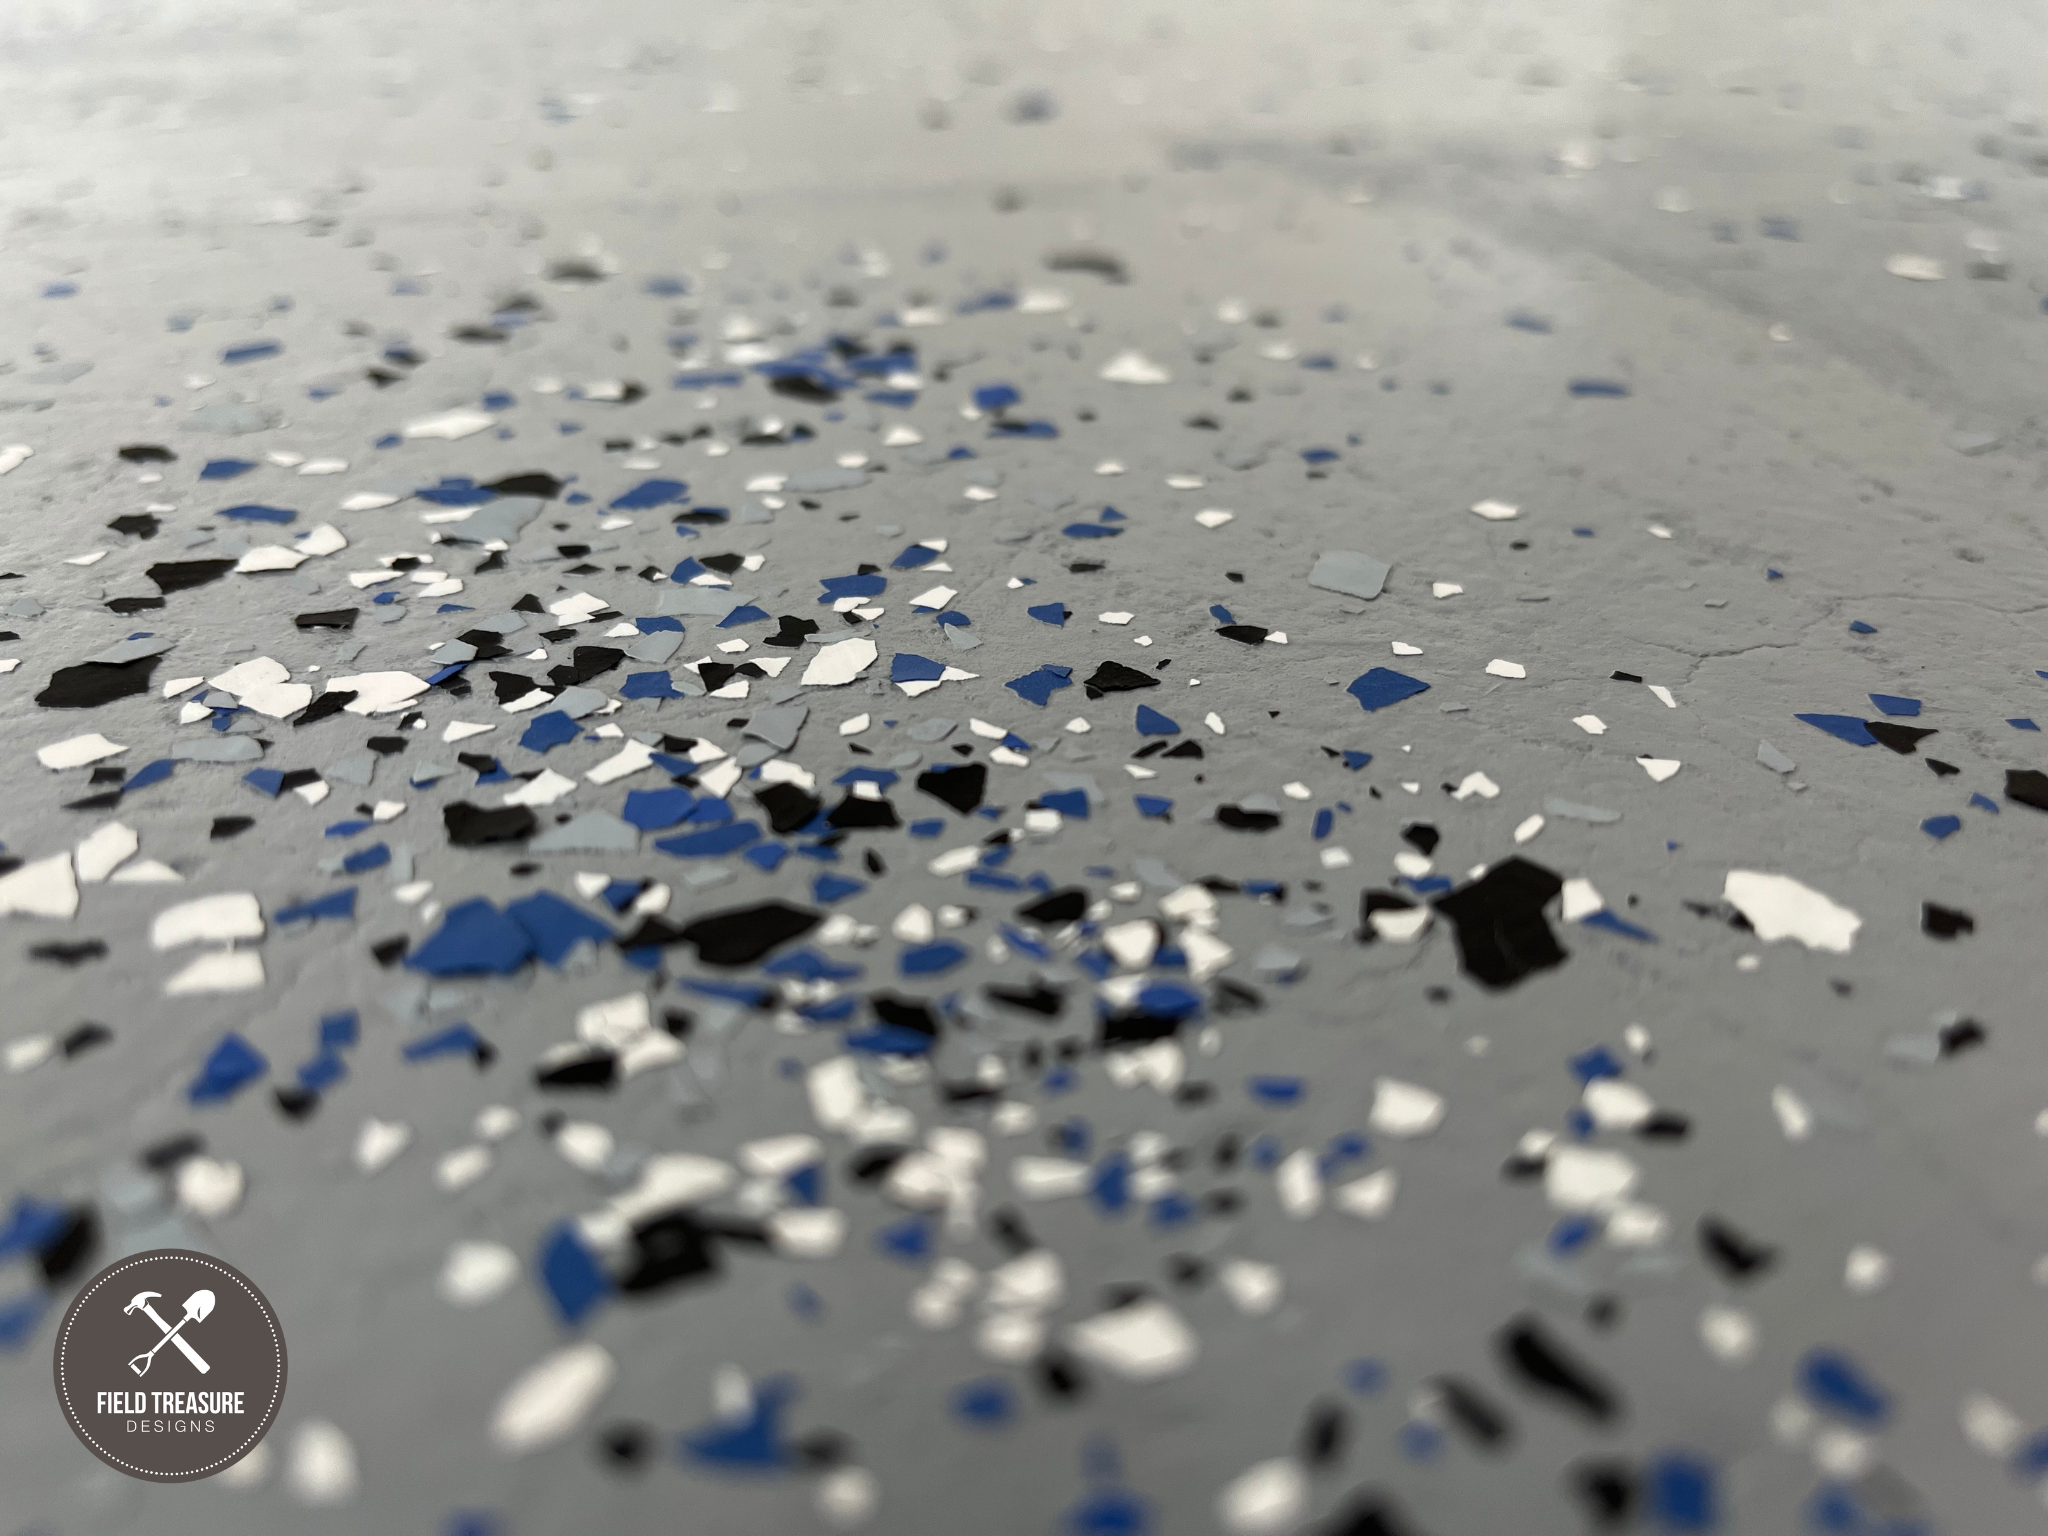
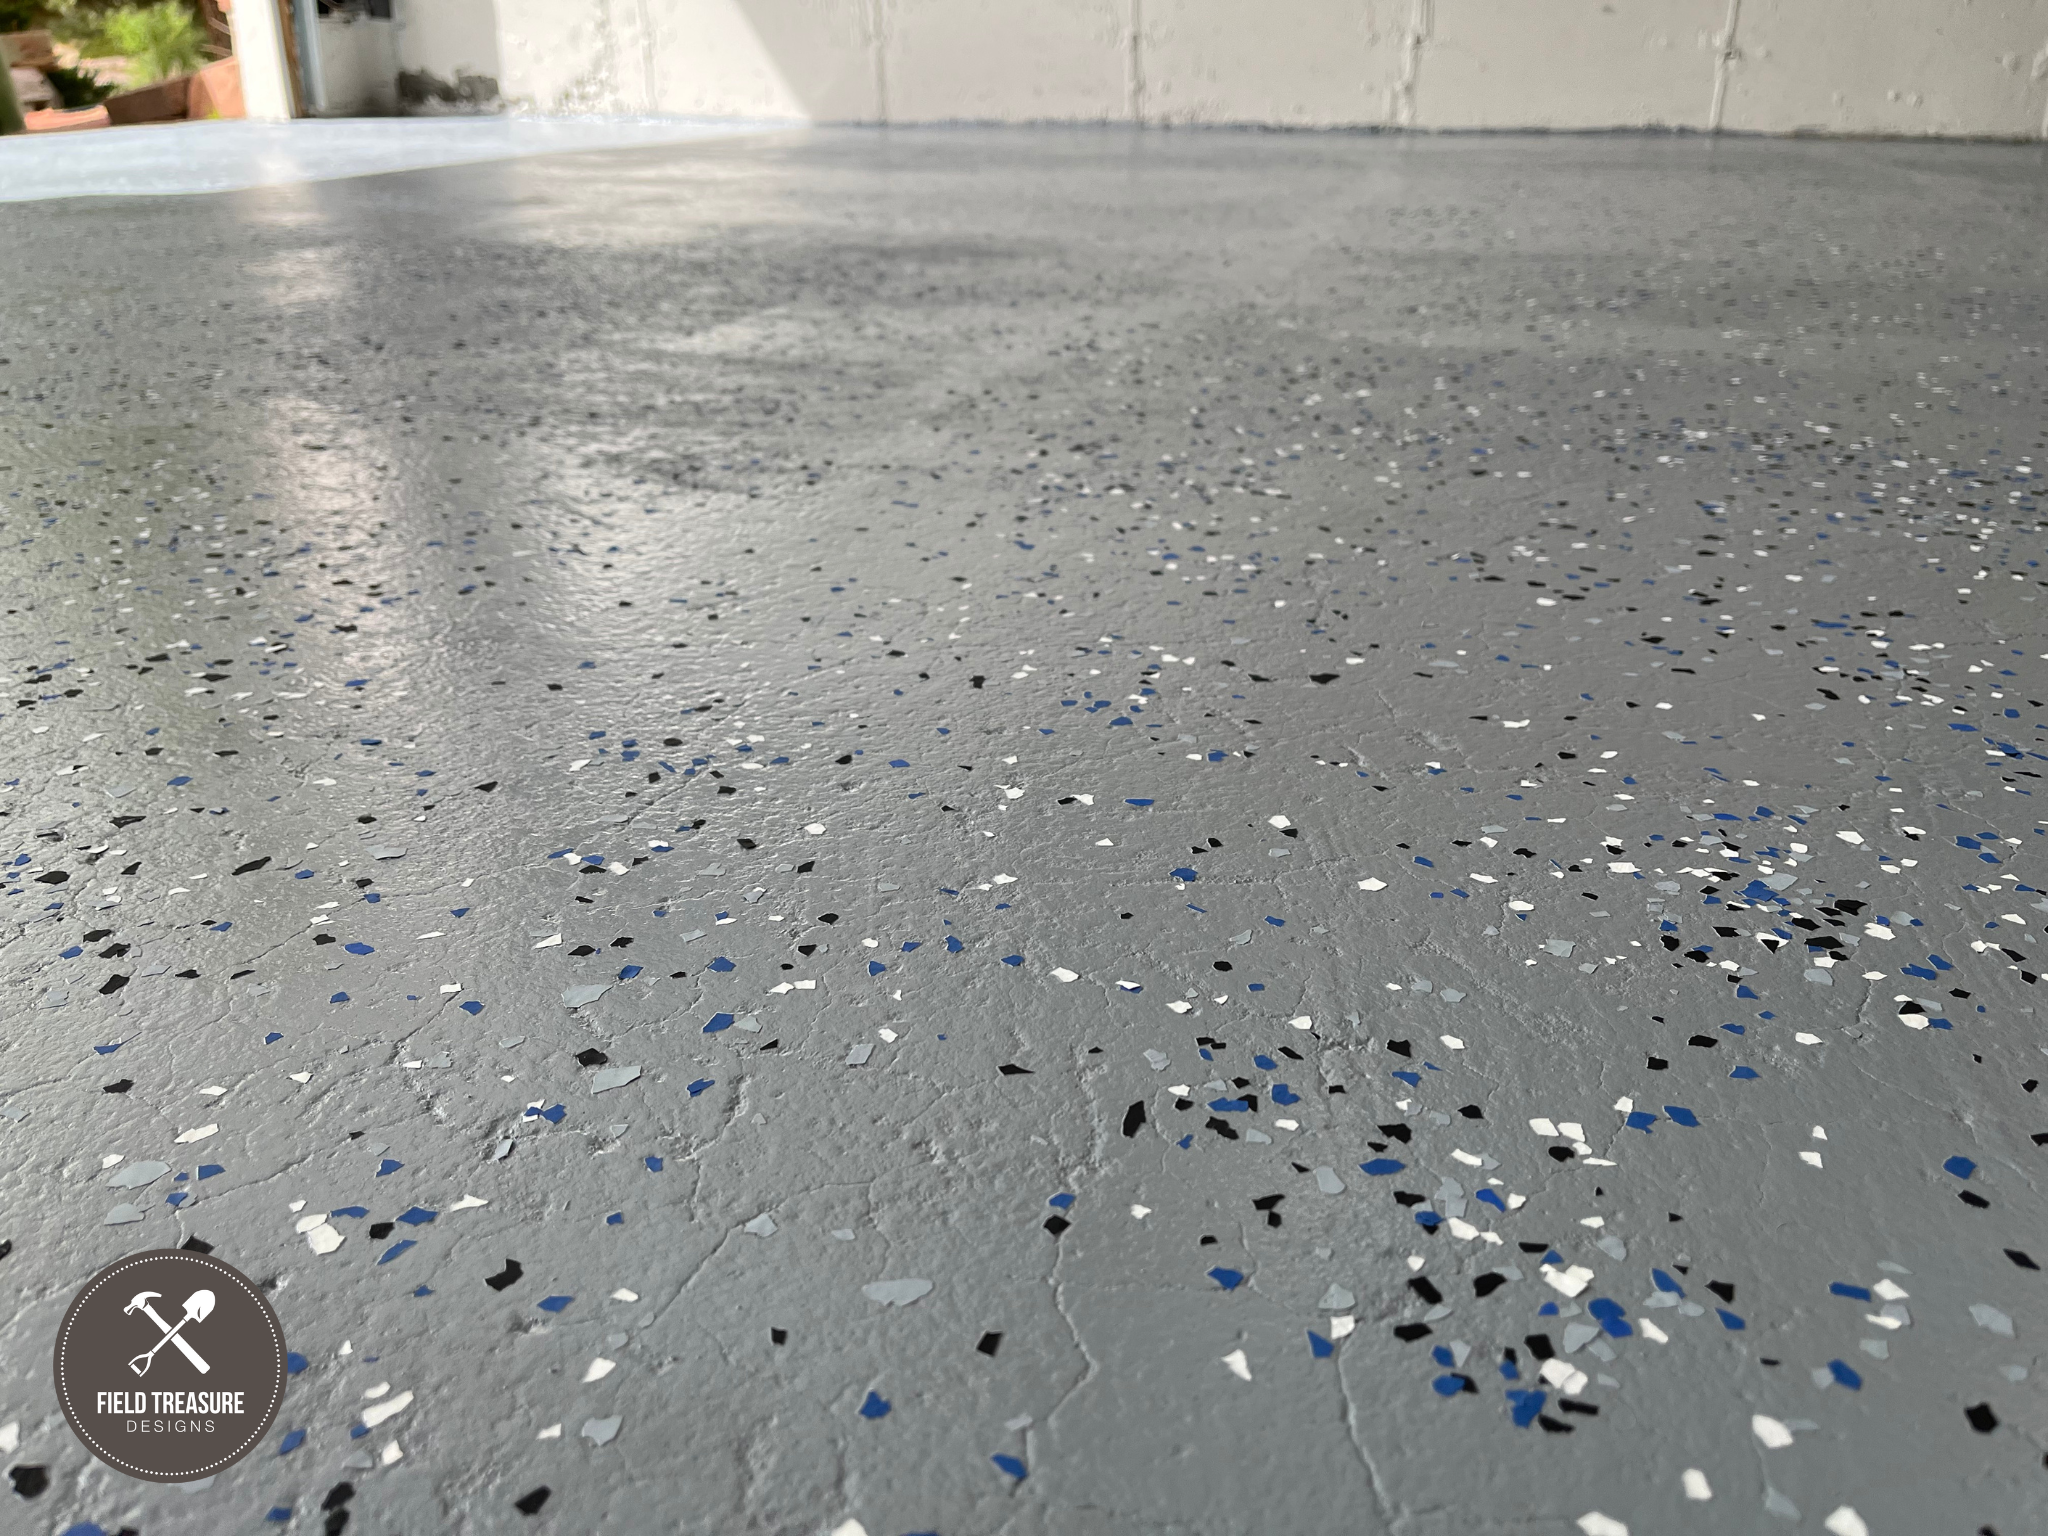
STEP 7: Mix the epoxy base and prepare to paint and spread decorative chips.
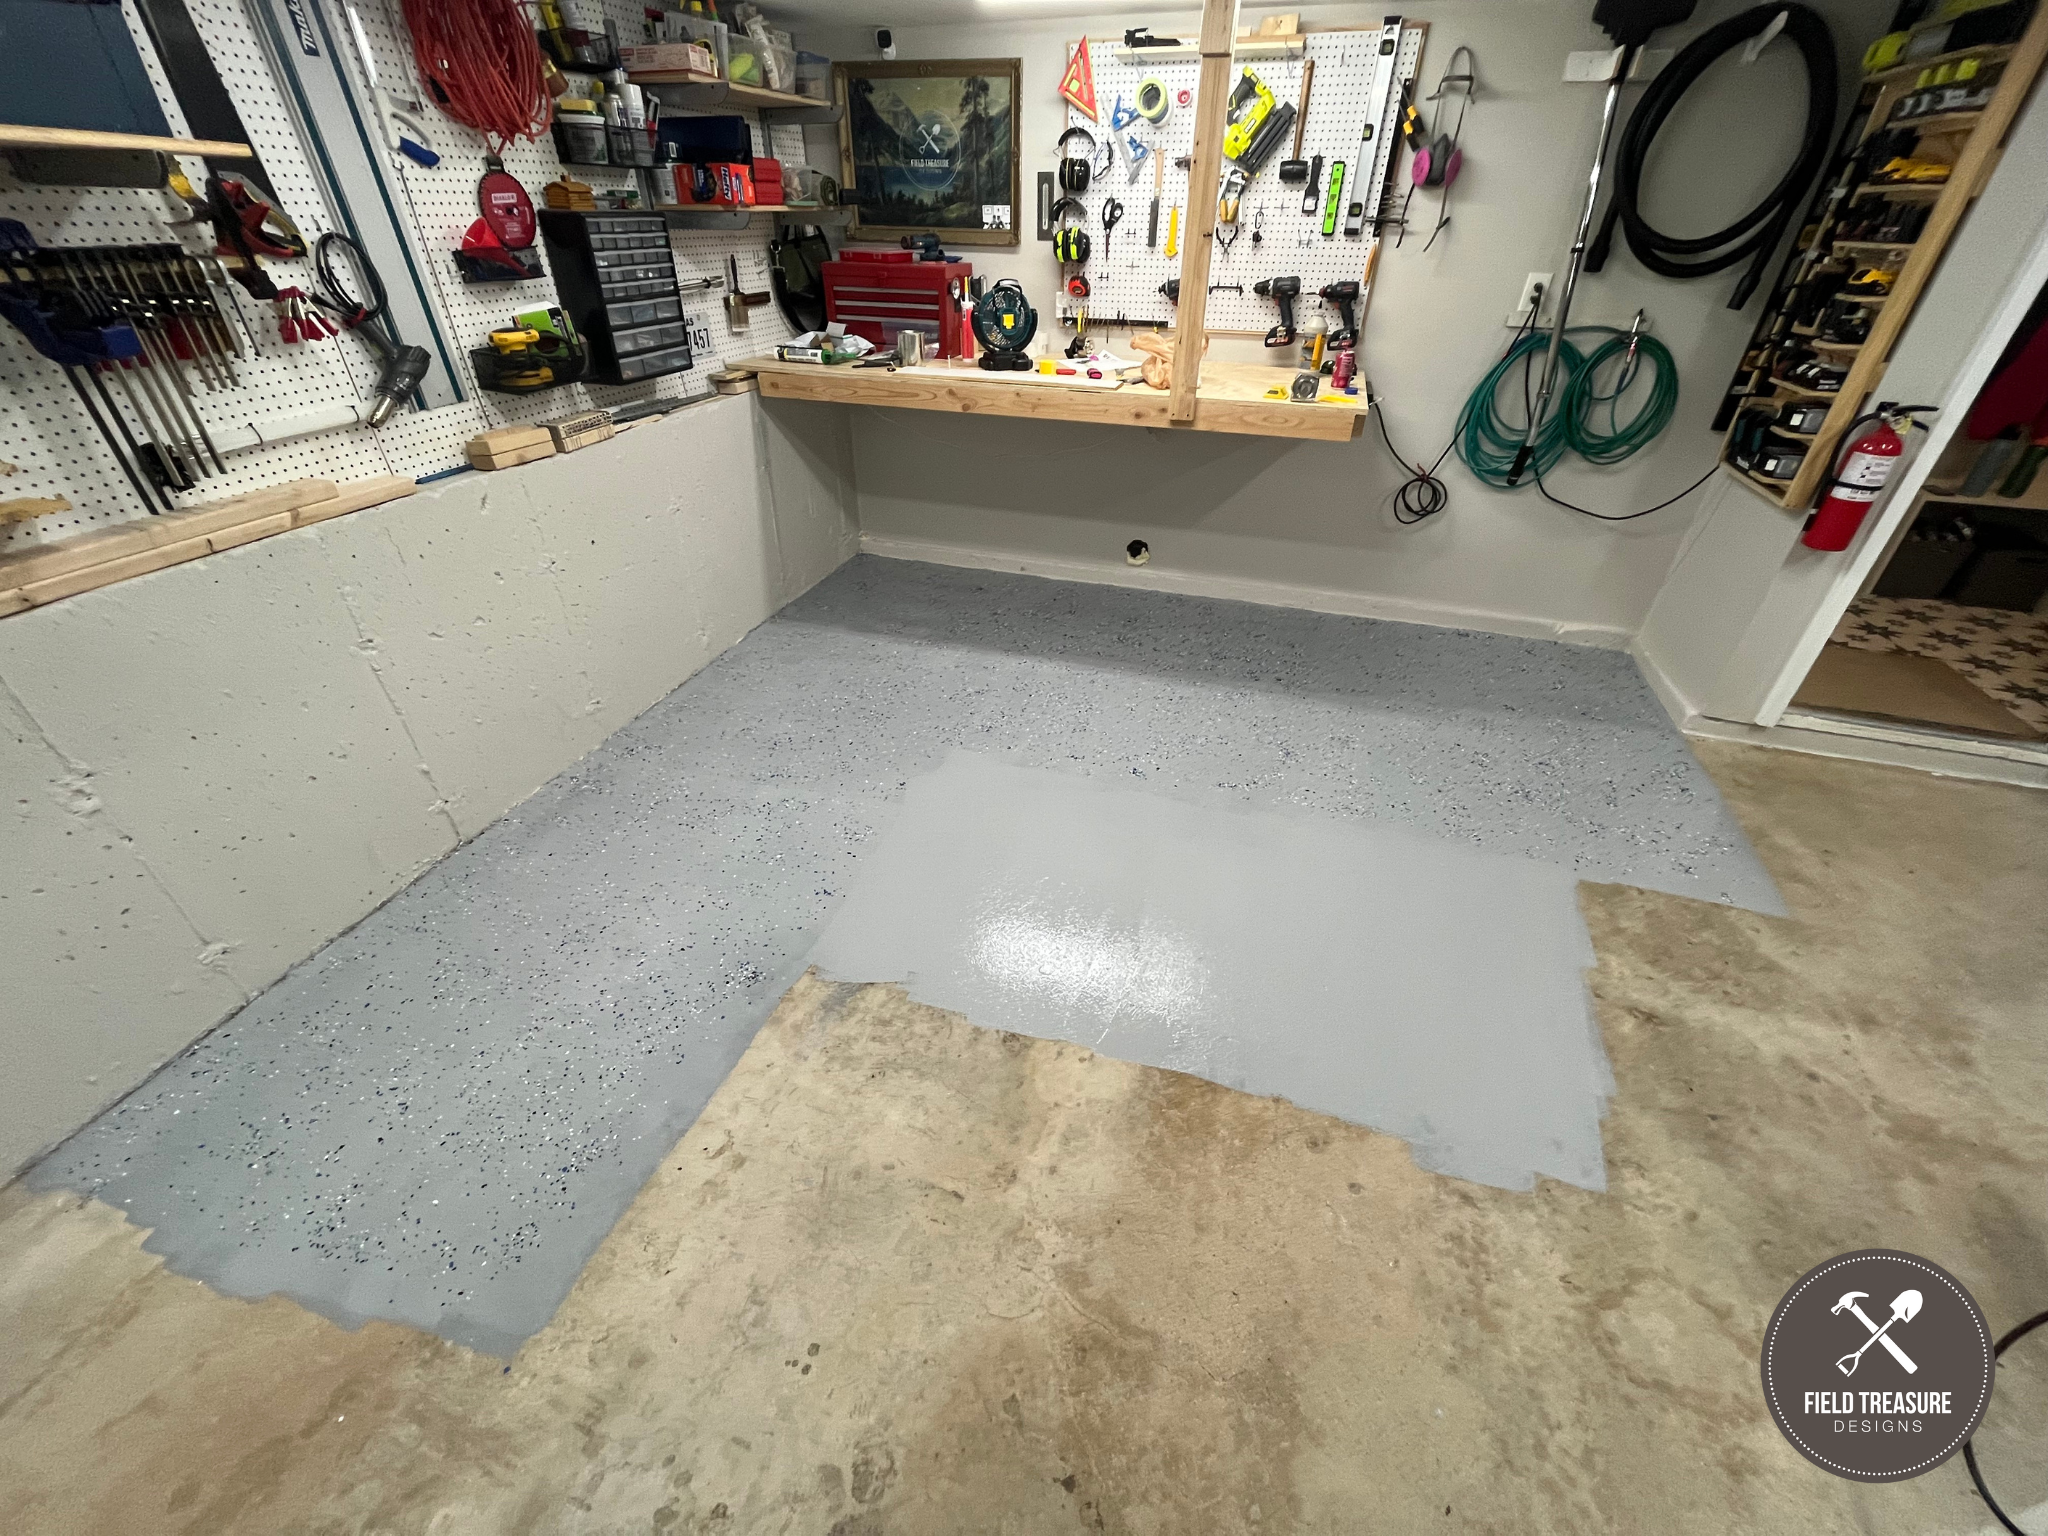
STEP 8: Paint the floor. (Have a buddy go behind and spread the decorative chips right away.) Allow to dry 24 hours.
STEP 9: Go across the entire floor with a brush or hand in a work glove to loosen any decorative chips that did not dry flat.
STEP 10: Blow out all the loose decorative chips. (There weren’t many.)
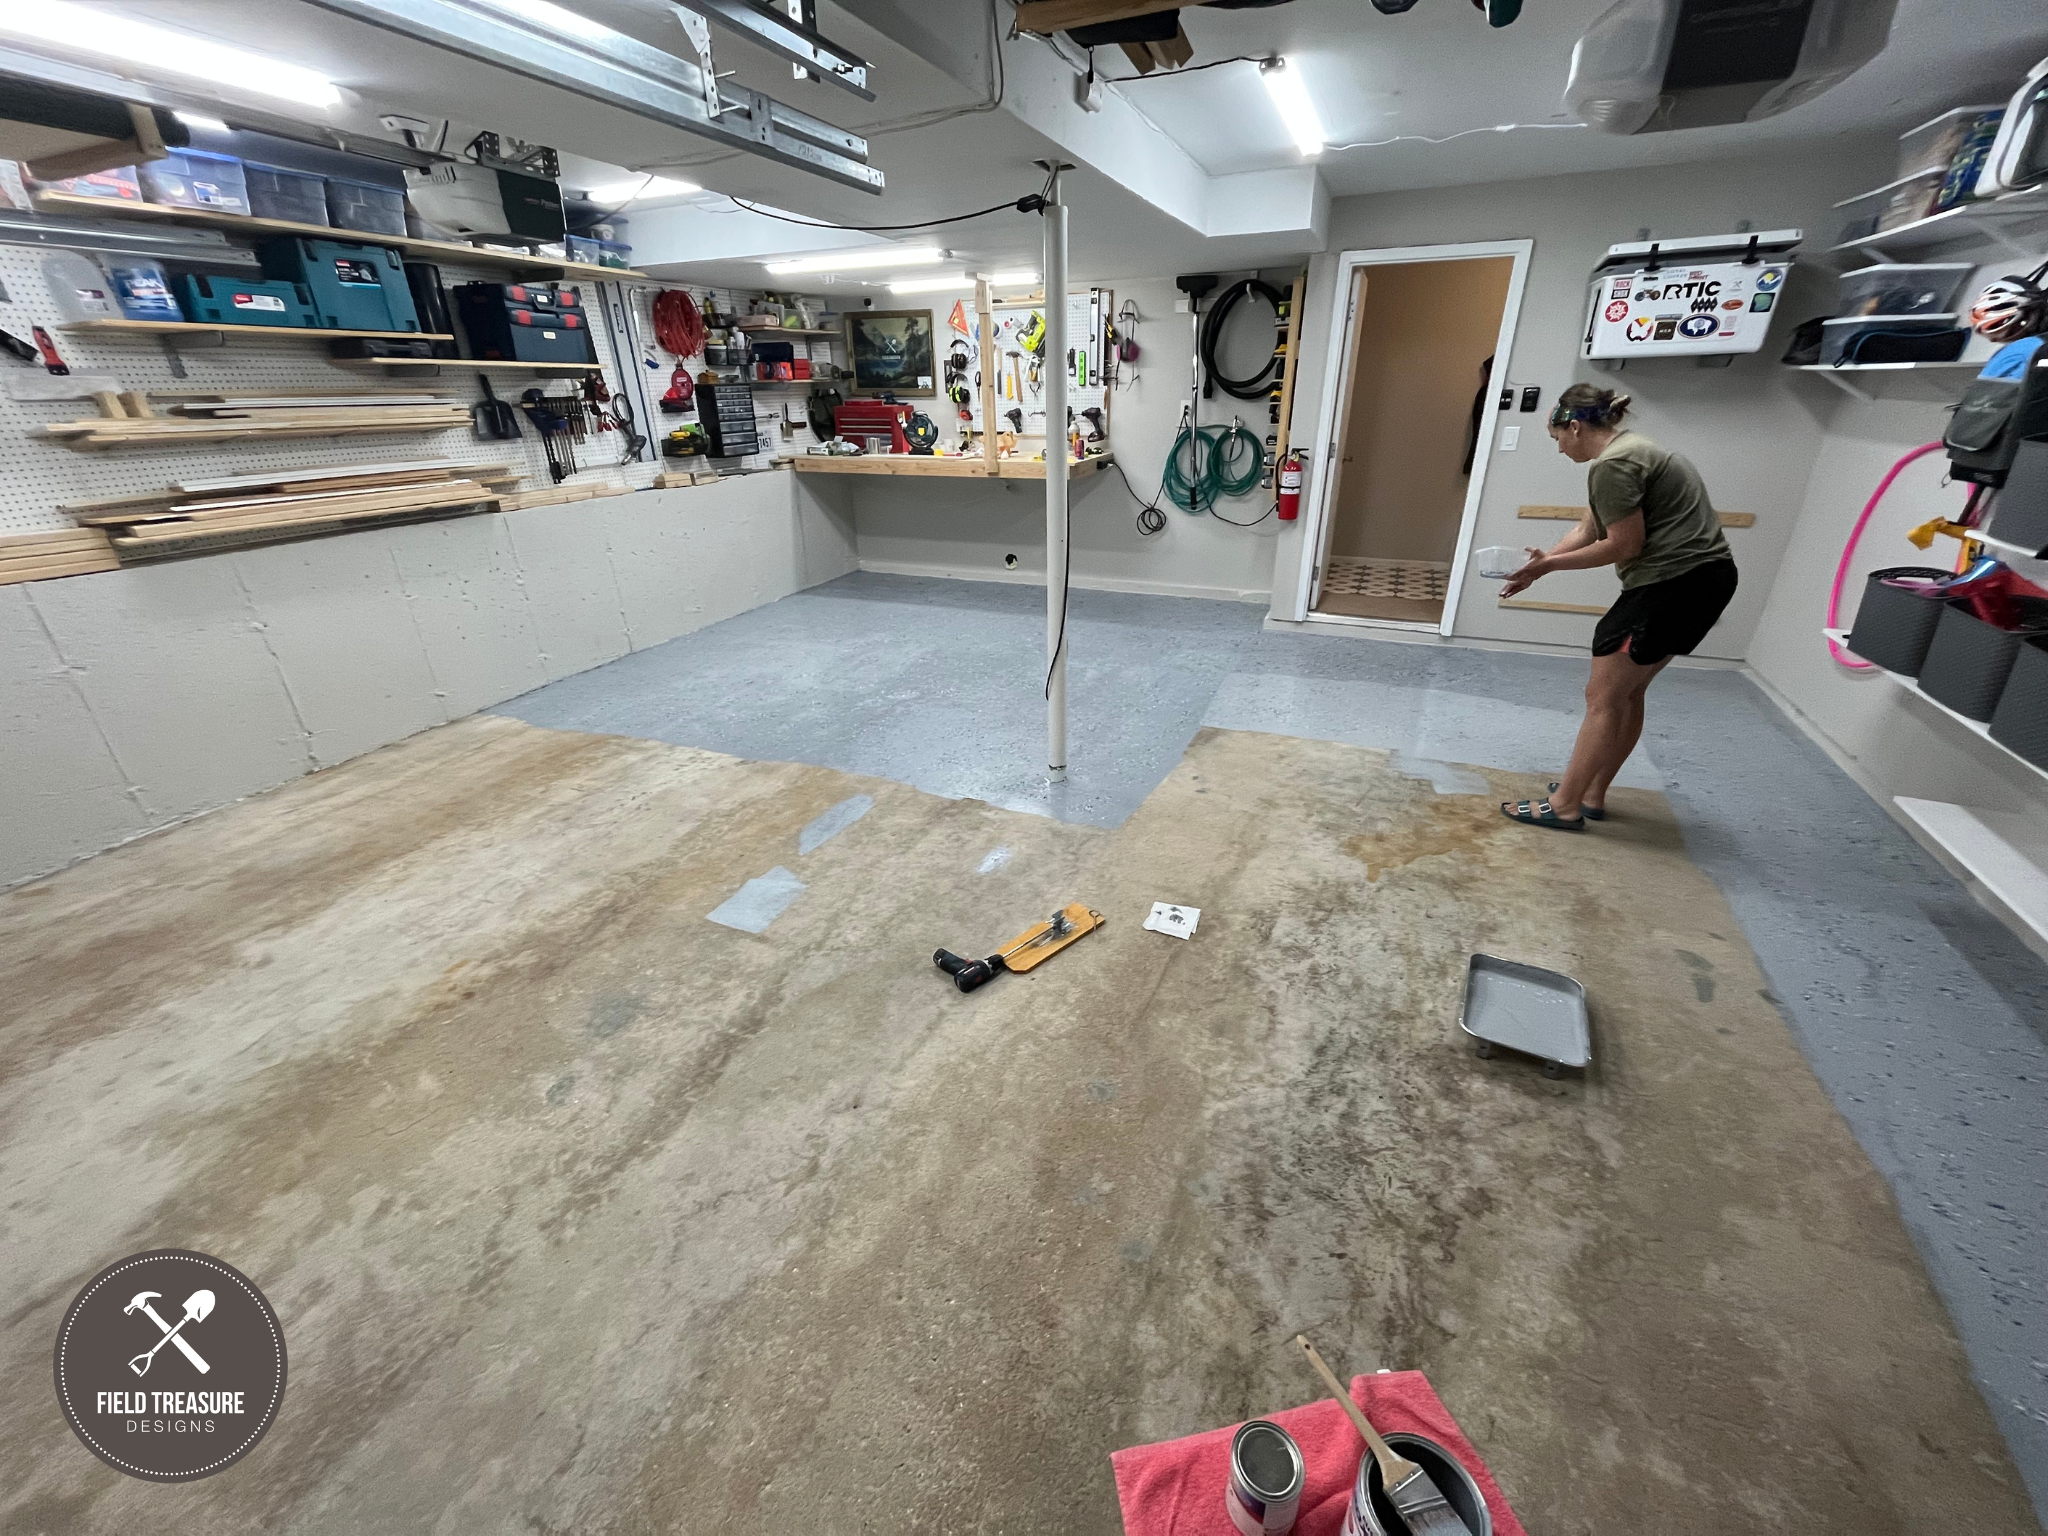
STEP 11: Prep the clear coating mix by mixing in the non skid sand. (Highly recommend using some measure of it).
STEP 12: Paint the floor. Allow to dry 24 hours.
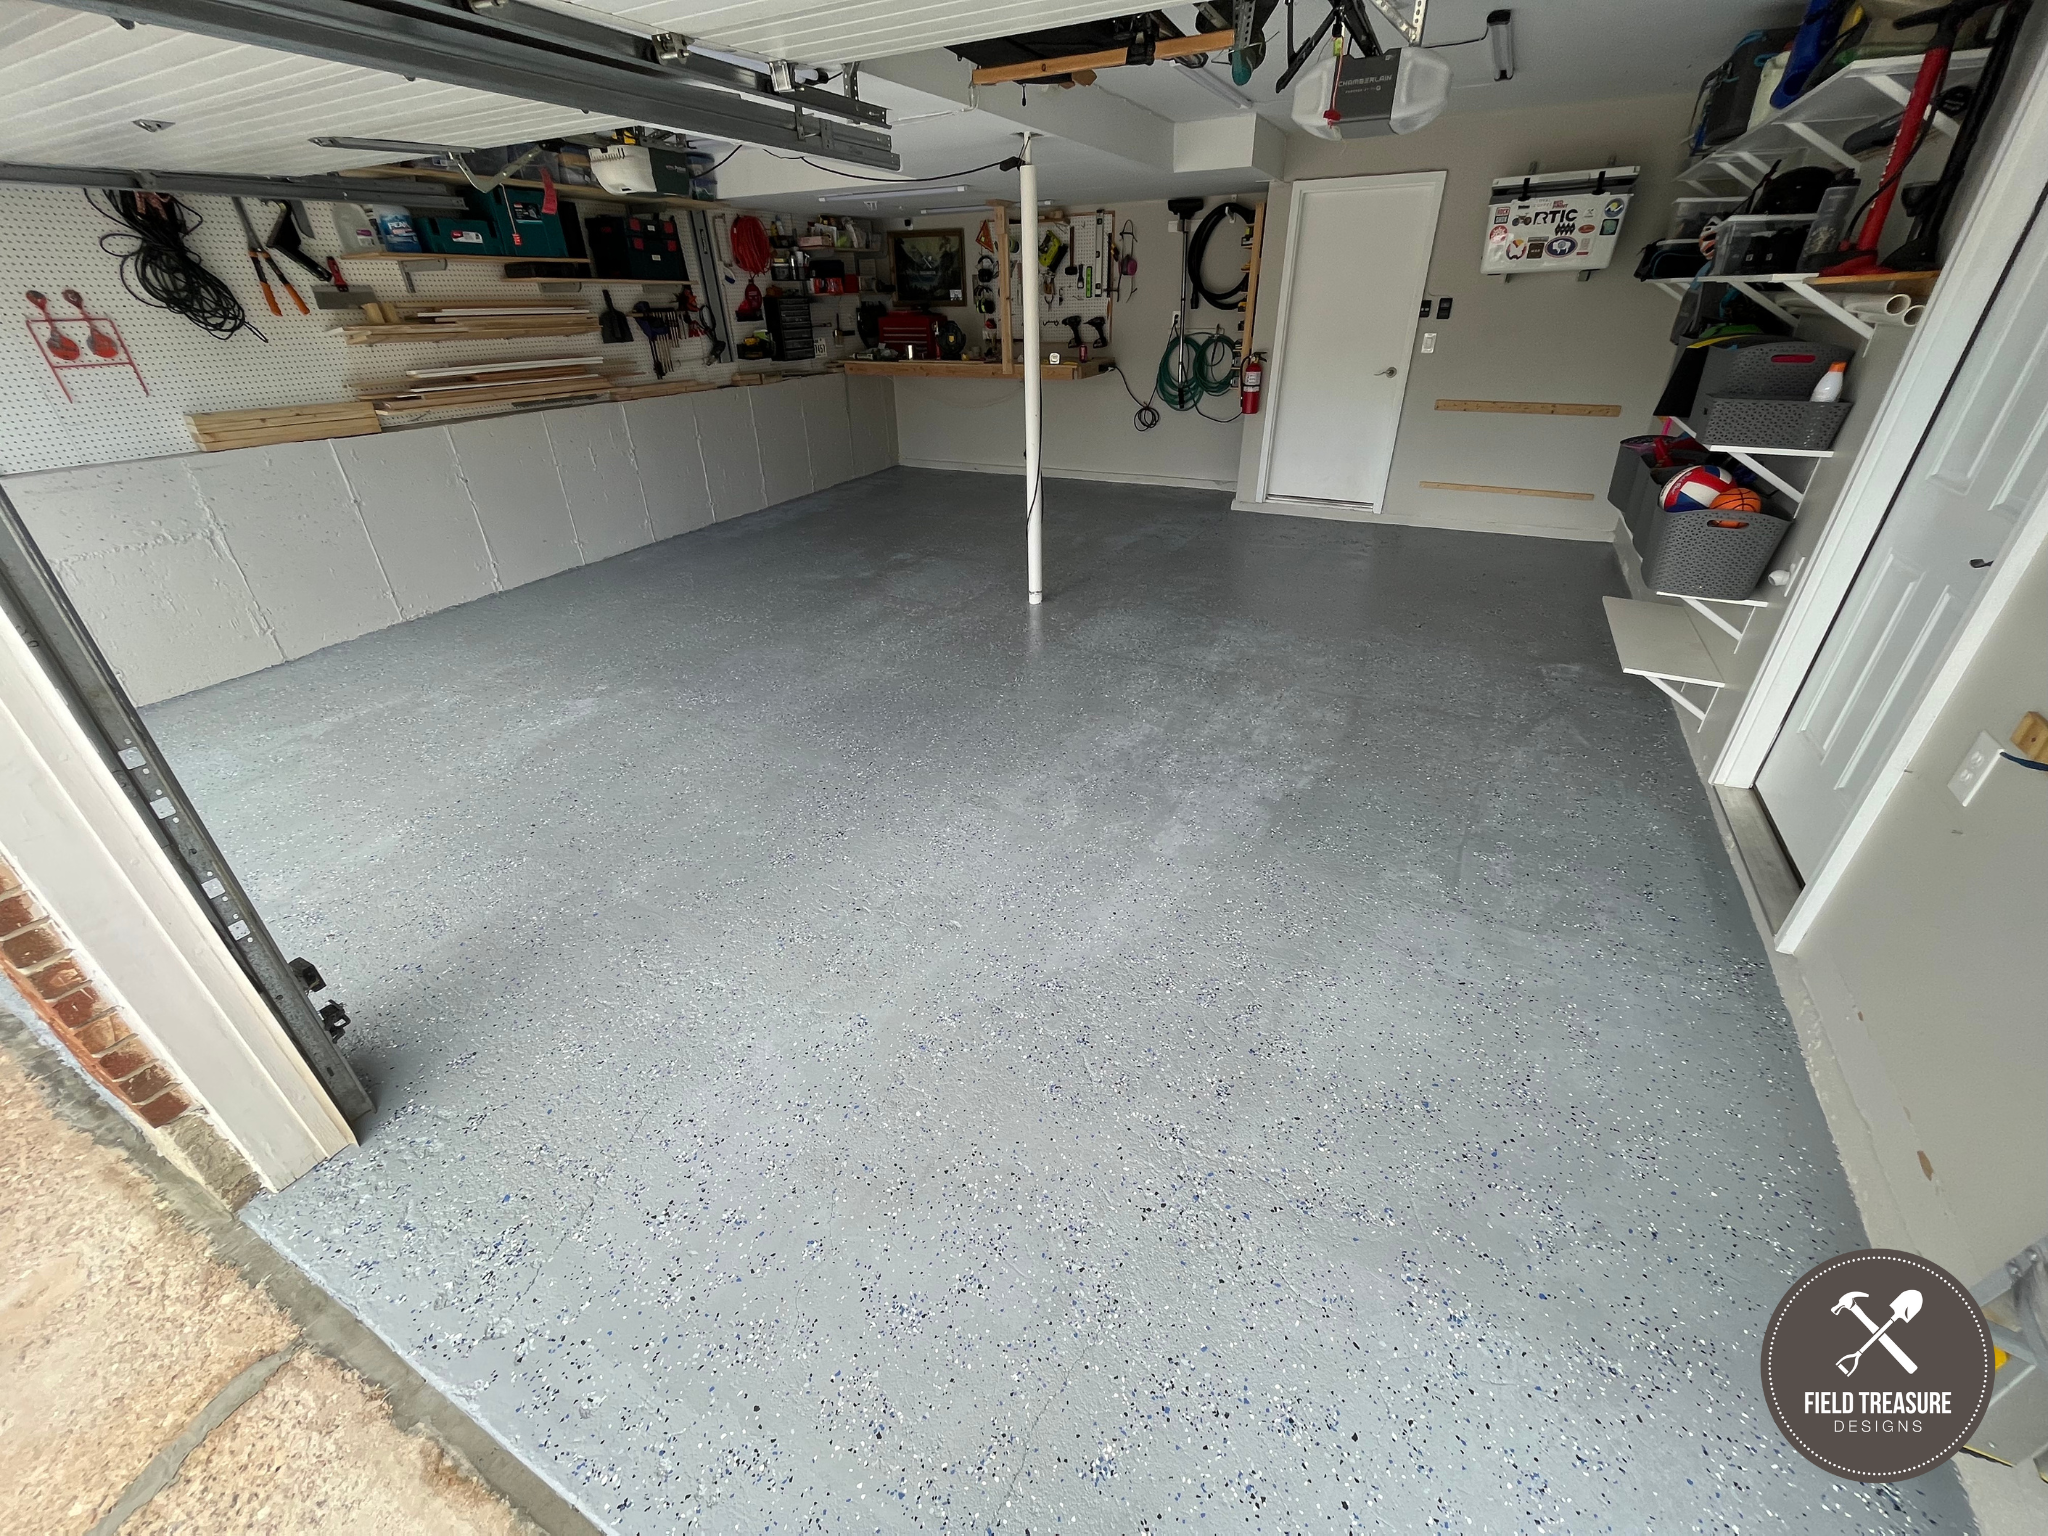
ENJOY!
STEP 1: Remove all the stuff on the floor and take low hanging items off the walls.

STEP 2: Pressure Wash the entire floor. Let dry.
STEP 3 : Apply stain remover to tough spots or entire surface (I recommend entire surface). Then pressure wash.

STEP 4: Apply degreaser to tough pots or entire surface (again, I recommend entire surface). Then pressure wash.
STEP 5: Apply concrete etching to entire surface. Then pressure wash.

STEP 6: Let dry for 48 hours. Use this time to apply quikrete, great stuff to fill gaps, caulk, and primer/paint to all areas of need.

STEP 7: Mix the epoxy base and prepare to paint and spread decorative chips.
STEP 8: Paint the floor. (Have a buddy go behind and spread the decorative chips right away.) Allow to dry 24 hours.
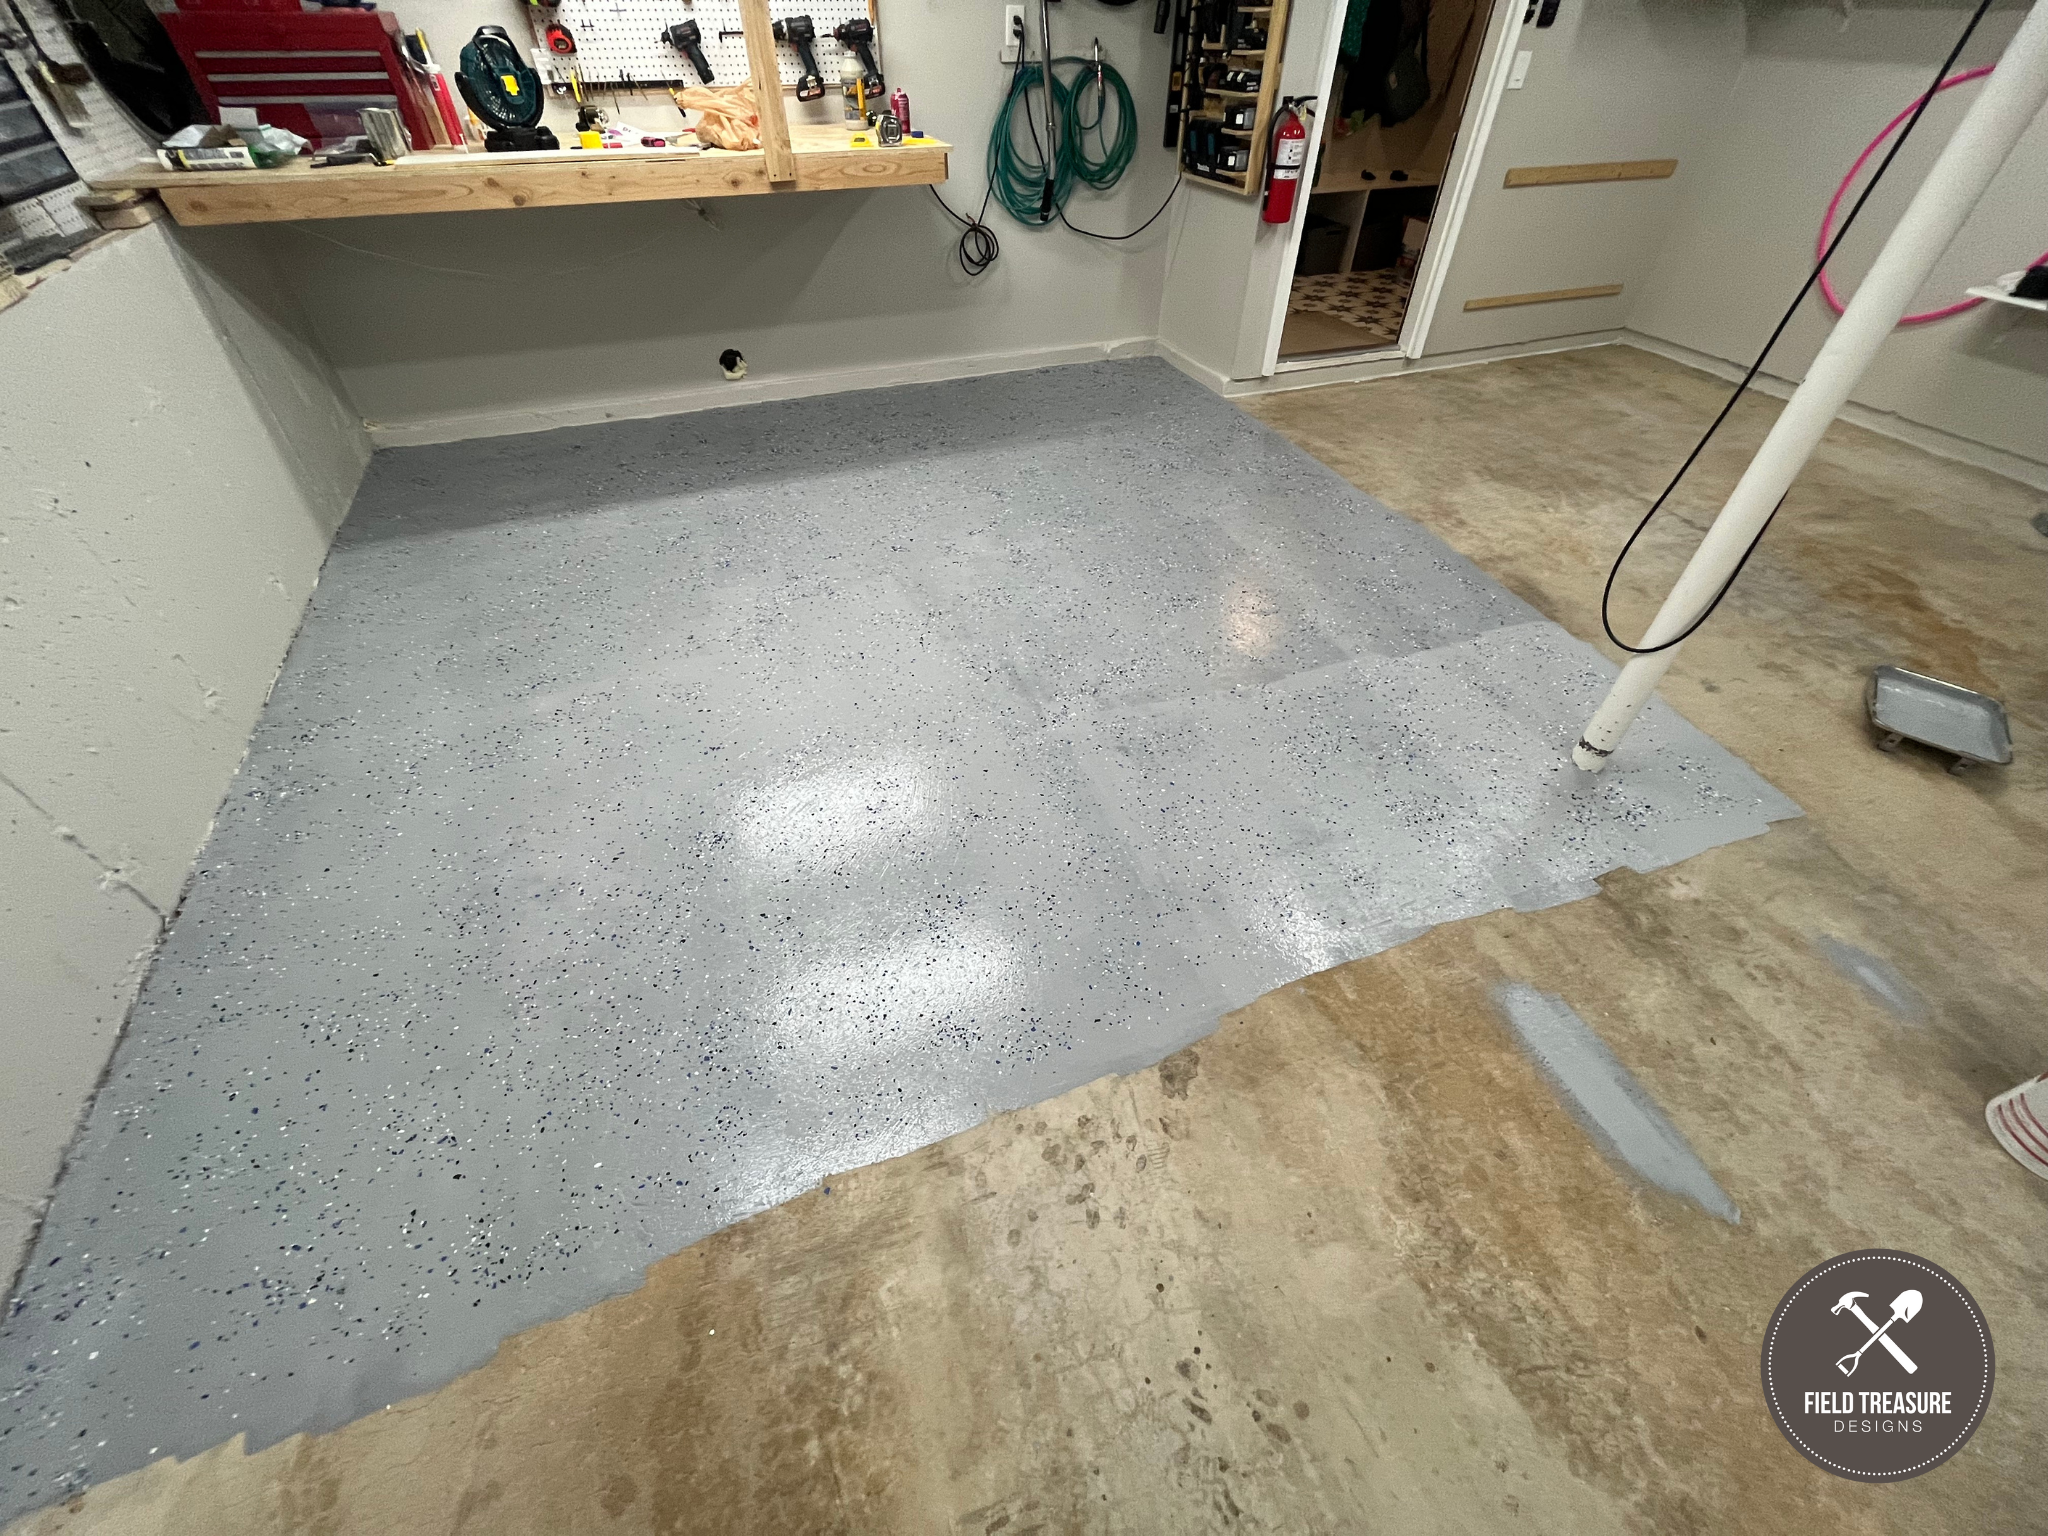
STEP 9: Go across the entire floor with a brush or hand in a work glove to loosen any decorative chips that did not dry flat.
STEP 12: Paint the floor. Allow to dry 24 hours.

Done! Wow that looks good!
In case you missed my latest blogs! Click HERE.
Here are some other videos you might enjoy!
Thanks for watching my DIY Garage Floor Epoxy Coating Video.